How to Process and Route Data Subject Requests
Requests submitted through your data subject request (DSR) portal arrive in the Captain Compliance app, where you track each one from intake to completion. Larger teams can also use workflows to route each request to the teams that need to act on it. This article covers both. To create the portal itself, see How to Generate and Customize a Data Subject Request (DSR) Portal.
Some screens in the app use the label DSAR. In this article, DSR and DSAR mean the same thing.
Find and open a request
Select DSR Portal in the sidebar, and then select Requests. The list shows each requester, the form the request came through, the request type, the status, and when it was created and last updated.
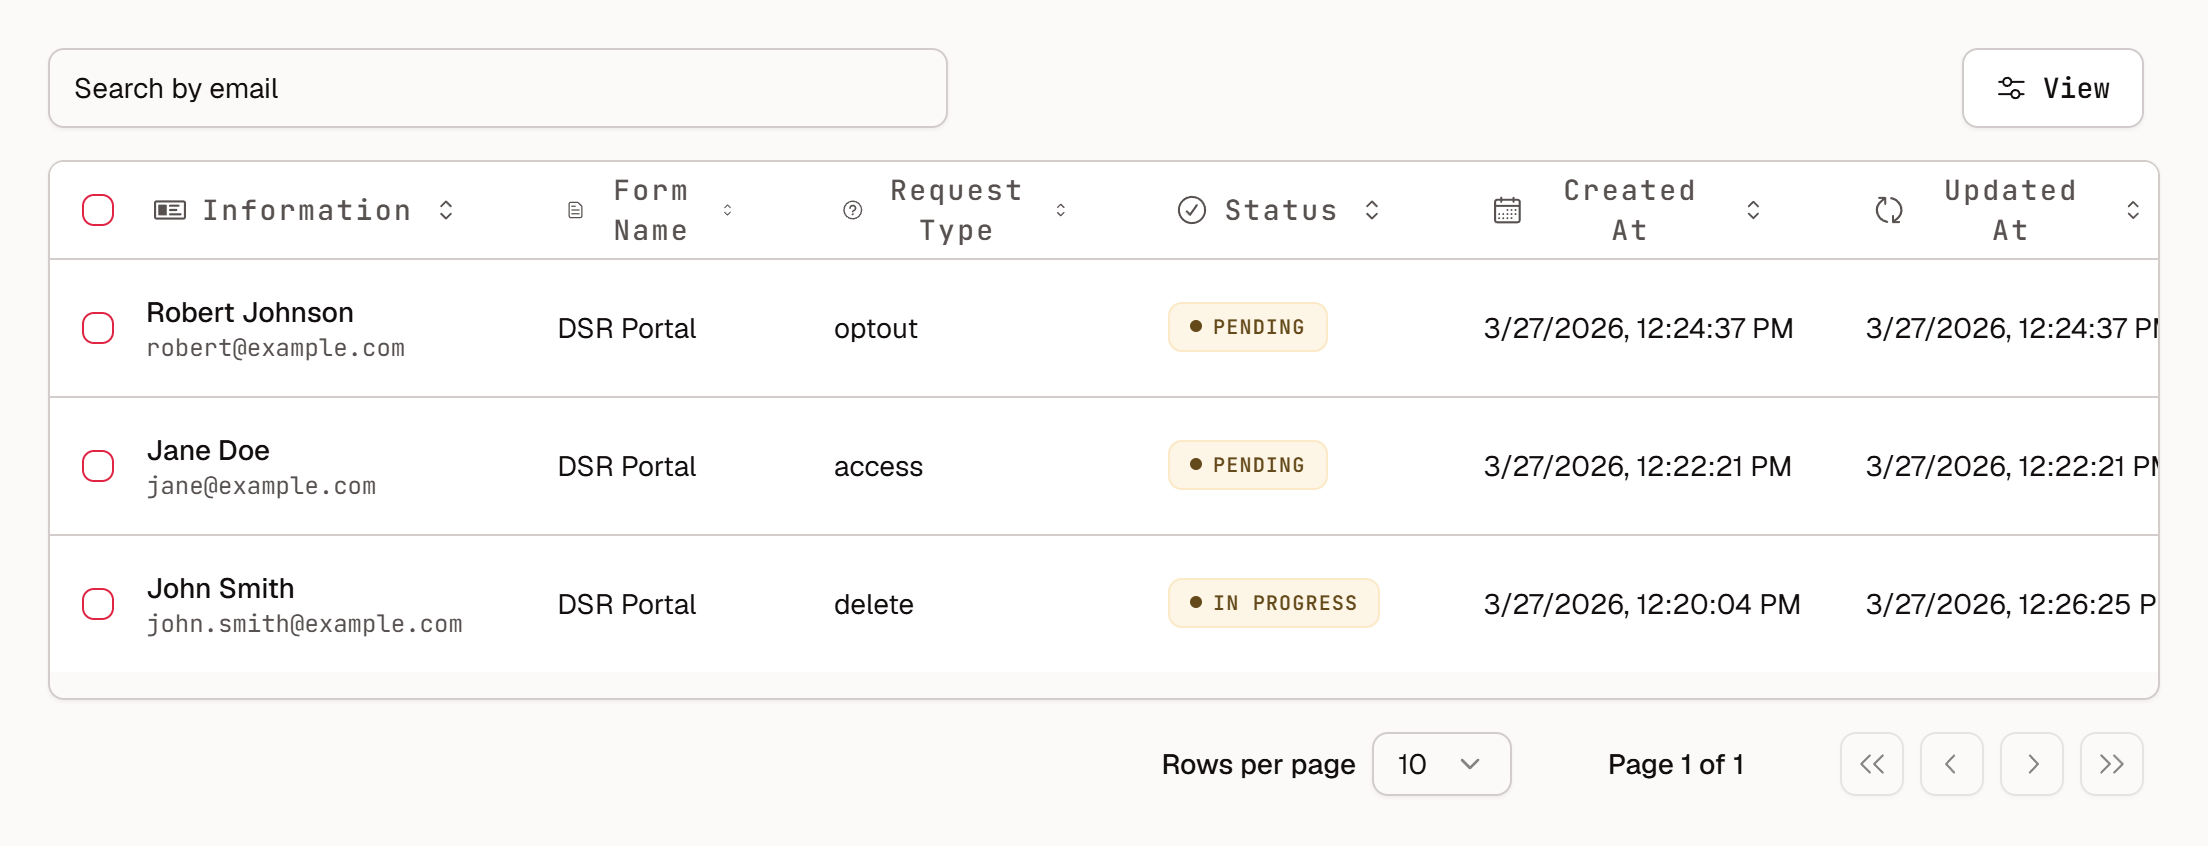
Use Search by email to find a specific requester.
Select a request to open it.
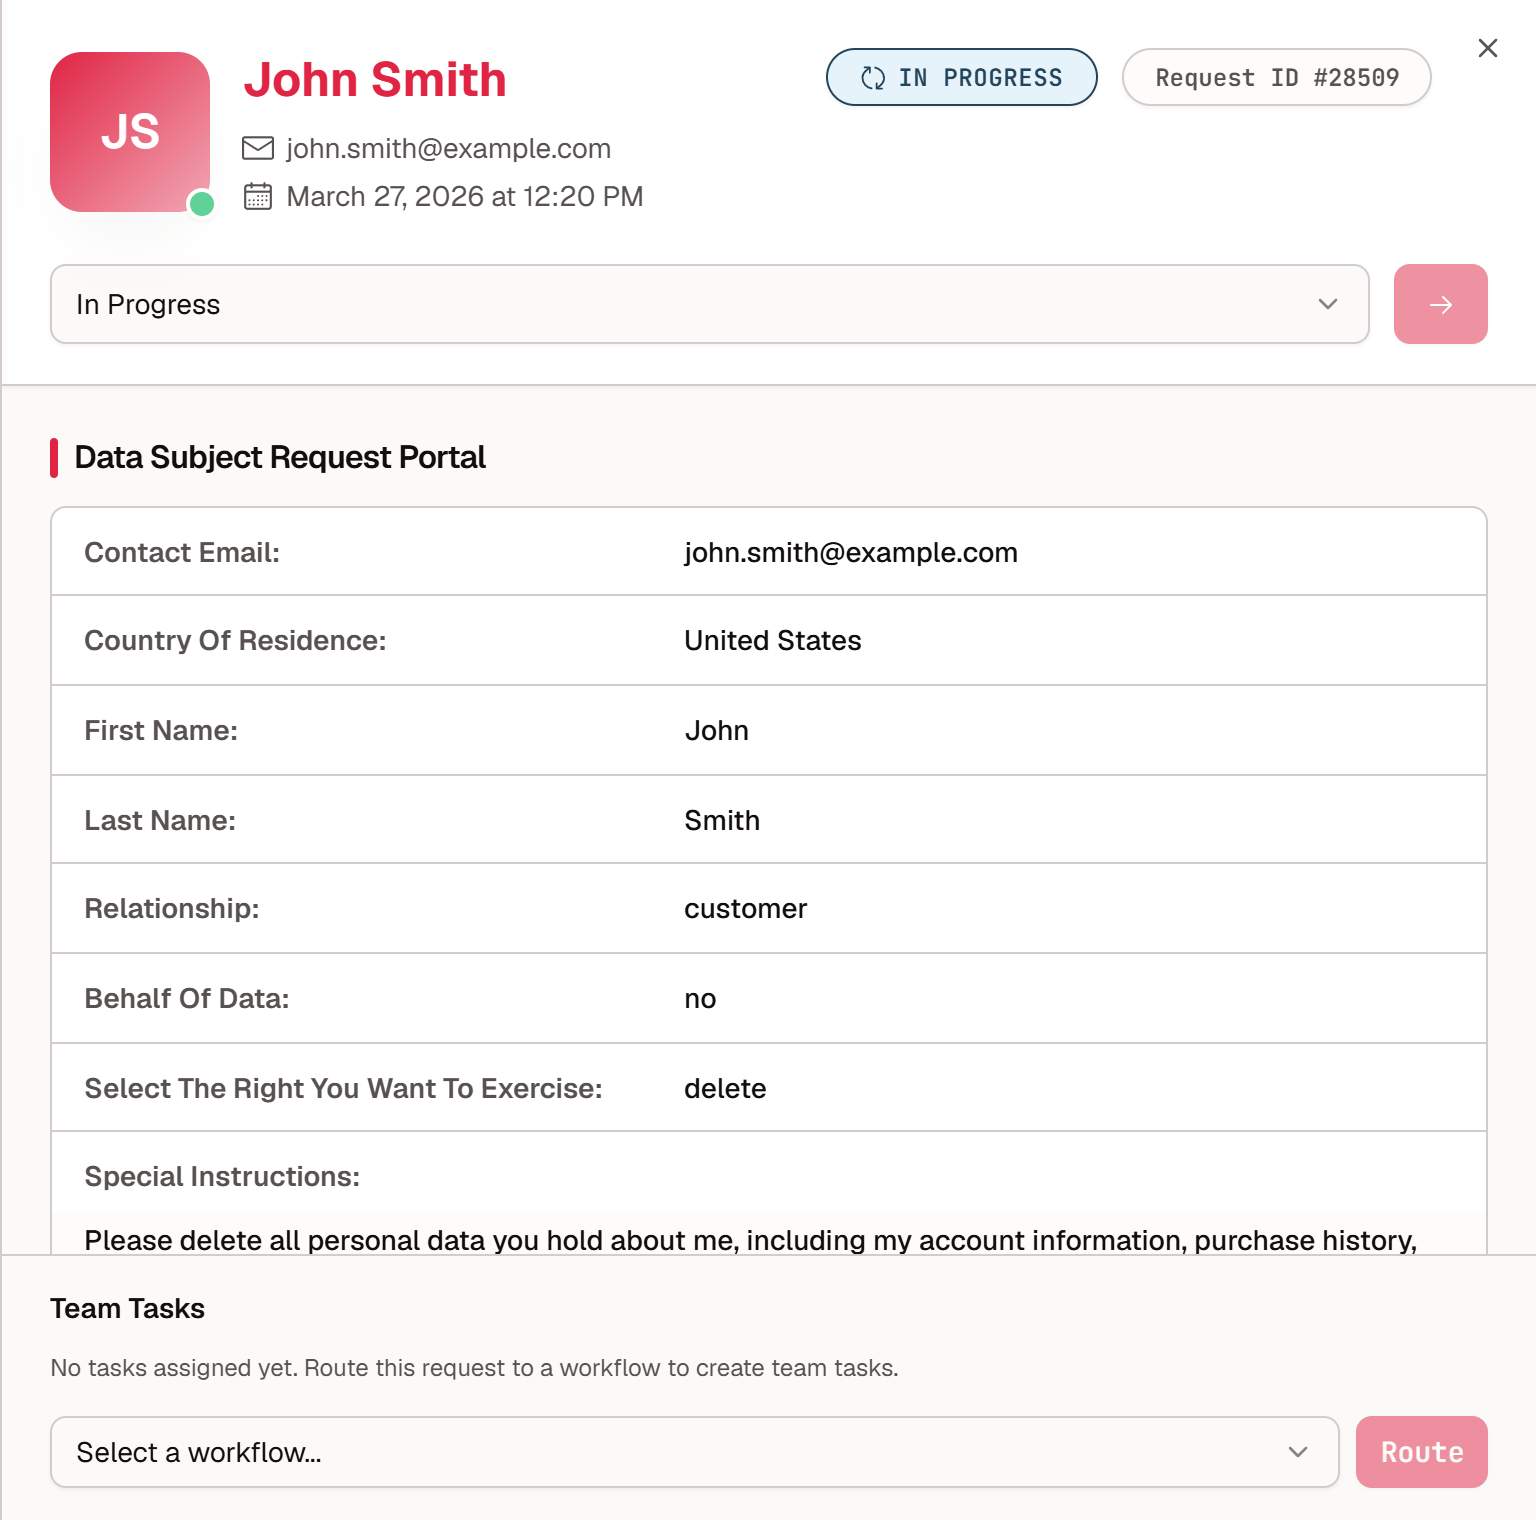
The request panel shows the requester’s name and email address, the submission date, the Request ID, the current status, and every answer given on the form.
Each portal also has its own Requests tab, under DSR Portal → Forms, which lists the requests for that portal only.
Update the status
To change a request’s status, choose the new status in the menu at the top of the request panel, and then select the arrow button next to it.
Status | Use it when |
|---|---|
Pending | The request has arrived and work has not started. |
In Progress | You are verifying the requester or fulfilling the request. |
Completed | The request has been fulfilled and the requester has been answered. |
Not Applicable | The submission is not a valid request, for example a duplicate or spam. |
Track deadlines
Privacy laws set response deadlines for these requests. The Forms list shows the Due days for each portal, and each workflow has its own Default Due Days. Agree the right number of days with your legal team.
Decide whether to route requests
Routing is optional. Without a workflow, requests stay in the Requests list and you handle them manually. With a workflow, each new submission creates tasks for the teams whose rules match.
Step 1: Create teams
Select DSR Portal → Teams.
Select New Team, enter a Team Name and an optional Description, and select Create.
Select the team. Under Add Member, enter the person’s Email, and optionally a Name and Role, and select Add.
Step 2: Create a workflow and its rules
Select DSR Portal → Workflows.
Select New Workflow, enter a Workflow Name, a Description, and the Default Due Days, and select Create.
Select the workflow, and then select Add Rule.
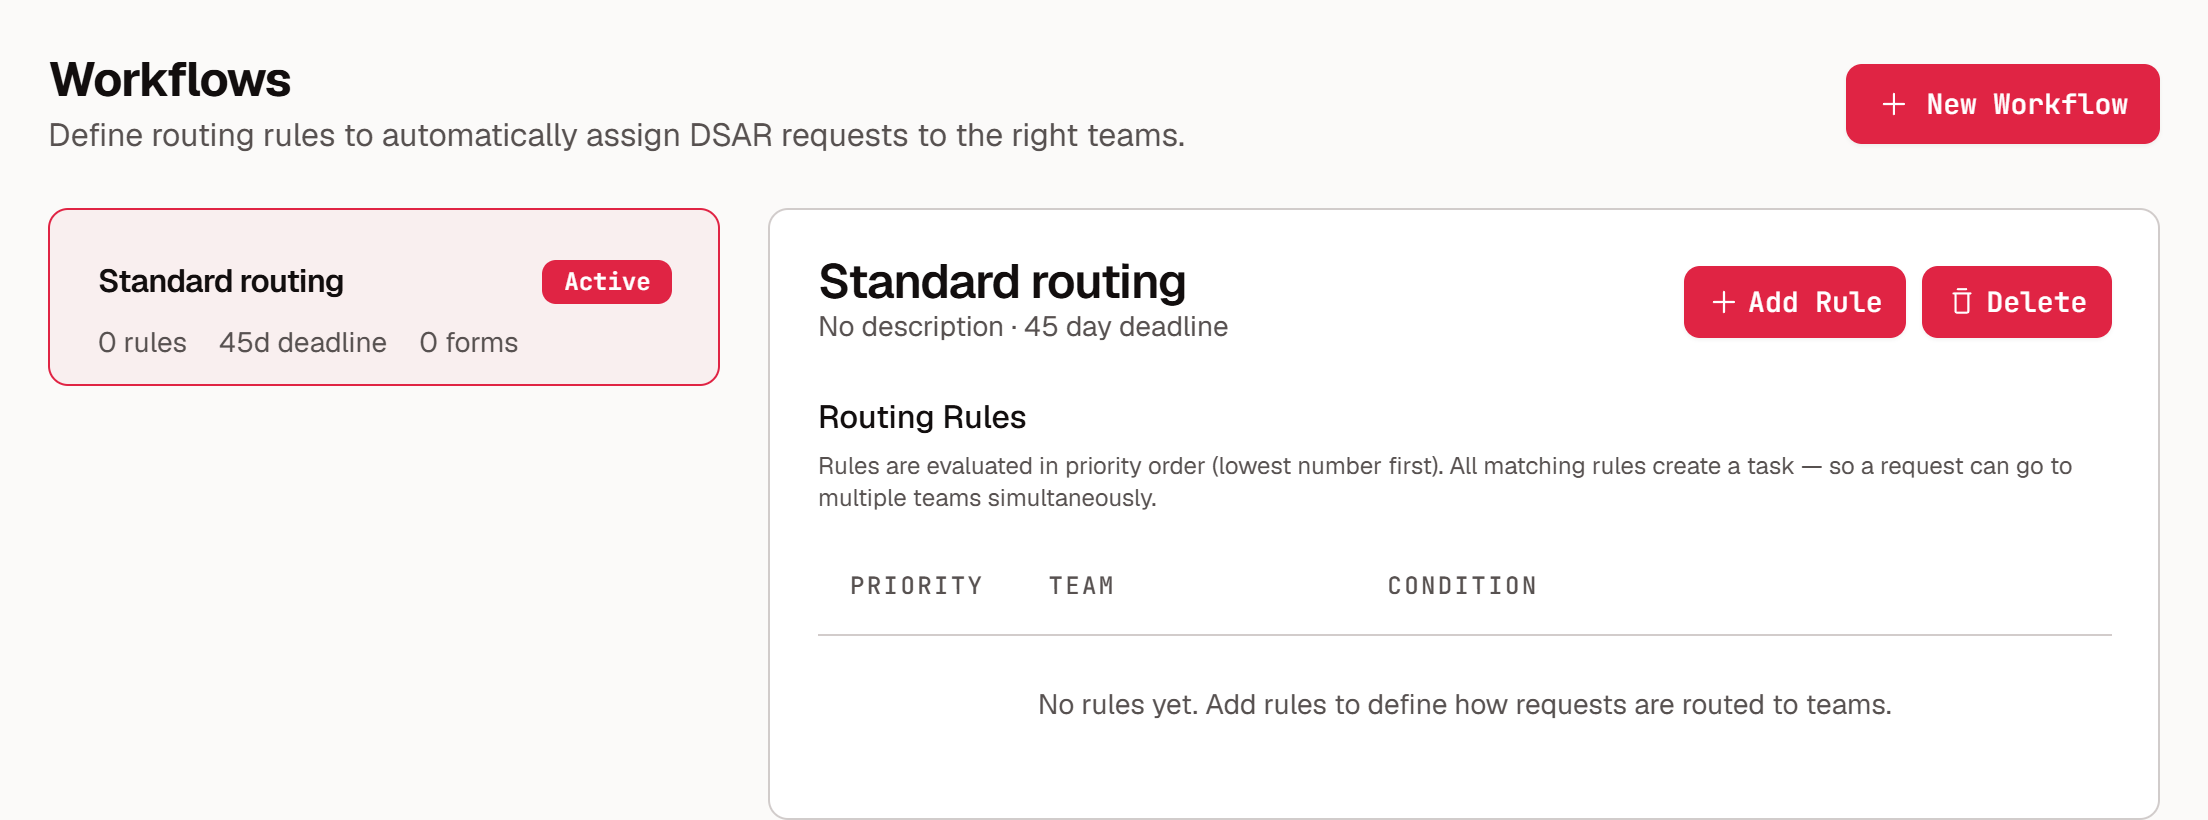
Under Assign to Team, choose the team that should receive the task.
Under Condition, choose Always (all requests) or By Request Type. The request types are Deletion, Do Not Sell, Limit Use, Access/Copy, Opt Out, and Other.
Enter a Priority, and select Add Rule.
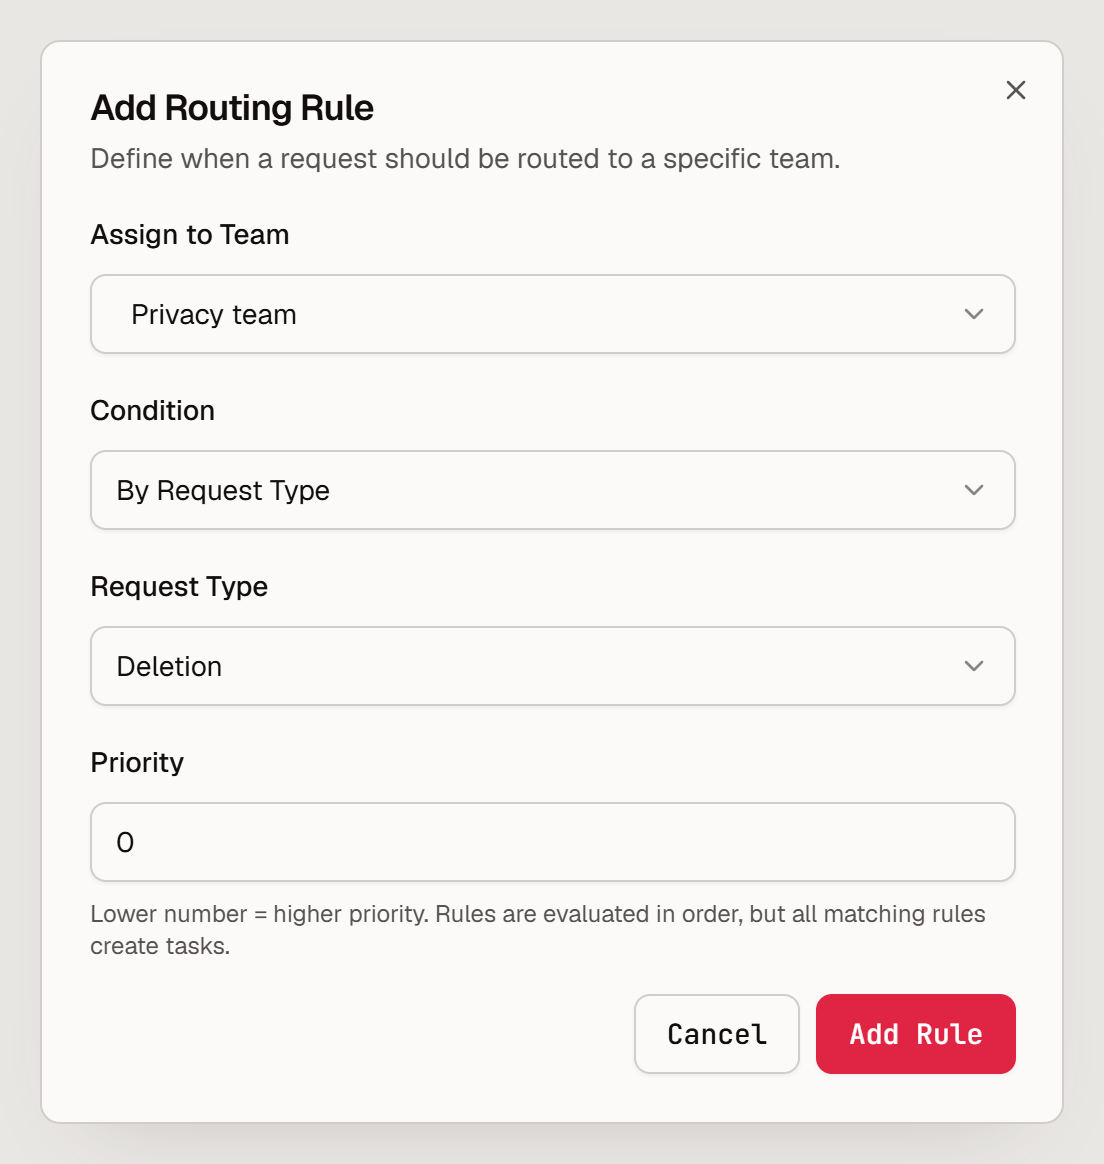
Rules are evaluated in priority order, lowest number first. Every matching rule creates a task, so one request can go to several teams at the same time.
Step 3: Link the workflow to a portal
Select DSR Portal → Forms, and then select your portal.
Open the Detail tab.
Under Routing Workflow, choose the workflow.
Select Save Settings.
The default setting is No workflow (manual routing). After a workflow is linked, new submissions automatically create tasks for the matching teams.
Route a single request by hand
To route a request that arrived before a workflow was linked, open the request, choose a workflow under Team Tasks, and select Route.
Work the task queue
Select DSR Portal → Task Queue to see the tasks assigned to your teams. The page counts Pending, In Progress, Completed, and Overdue tasks, and you can filter the list by team and by status. Each task shows its ID, requester, team, type, form, status, and due date.
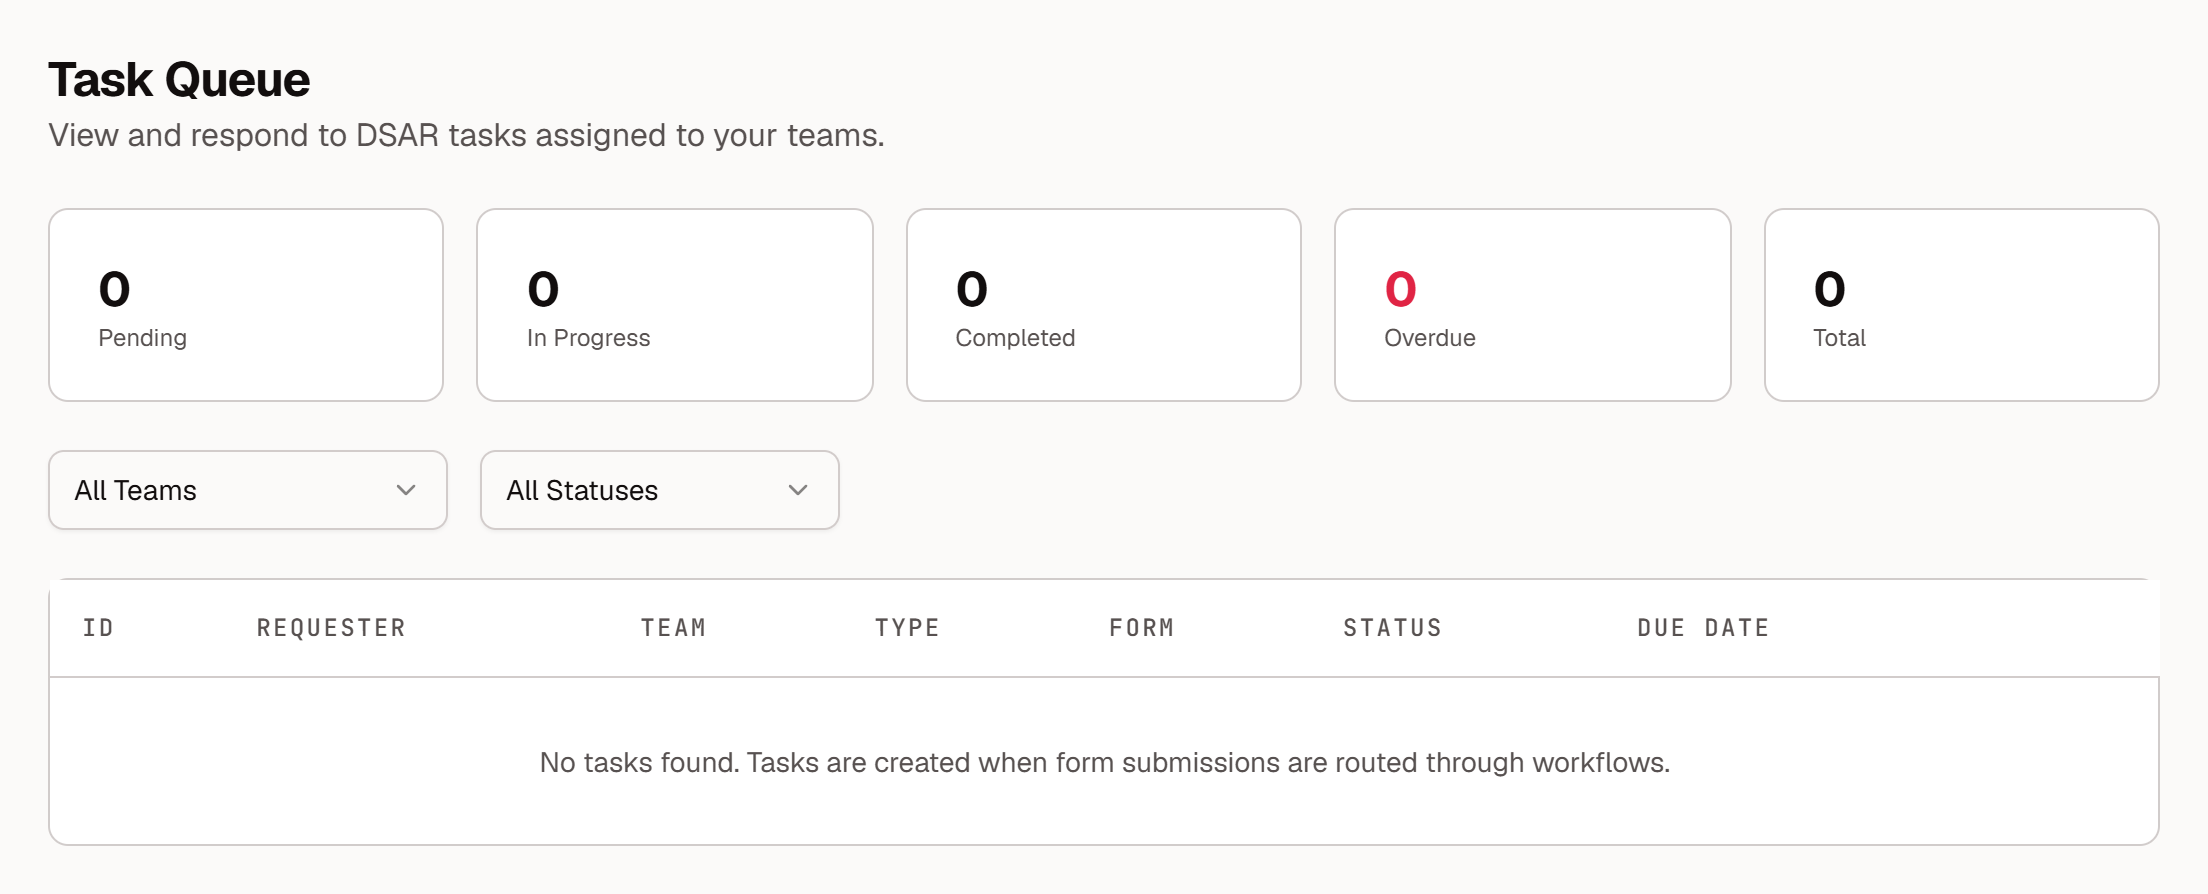
Tasks are created only when submissions are routed through a workflow.
Report on requests
Select DSR Portal → Reports and choose a year. The page shows Total Submissions, Completed, Pending, and Overdue, with three views:
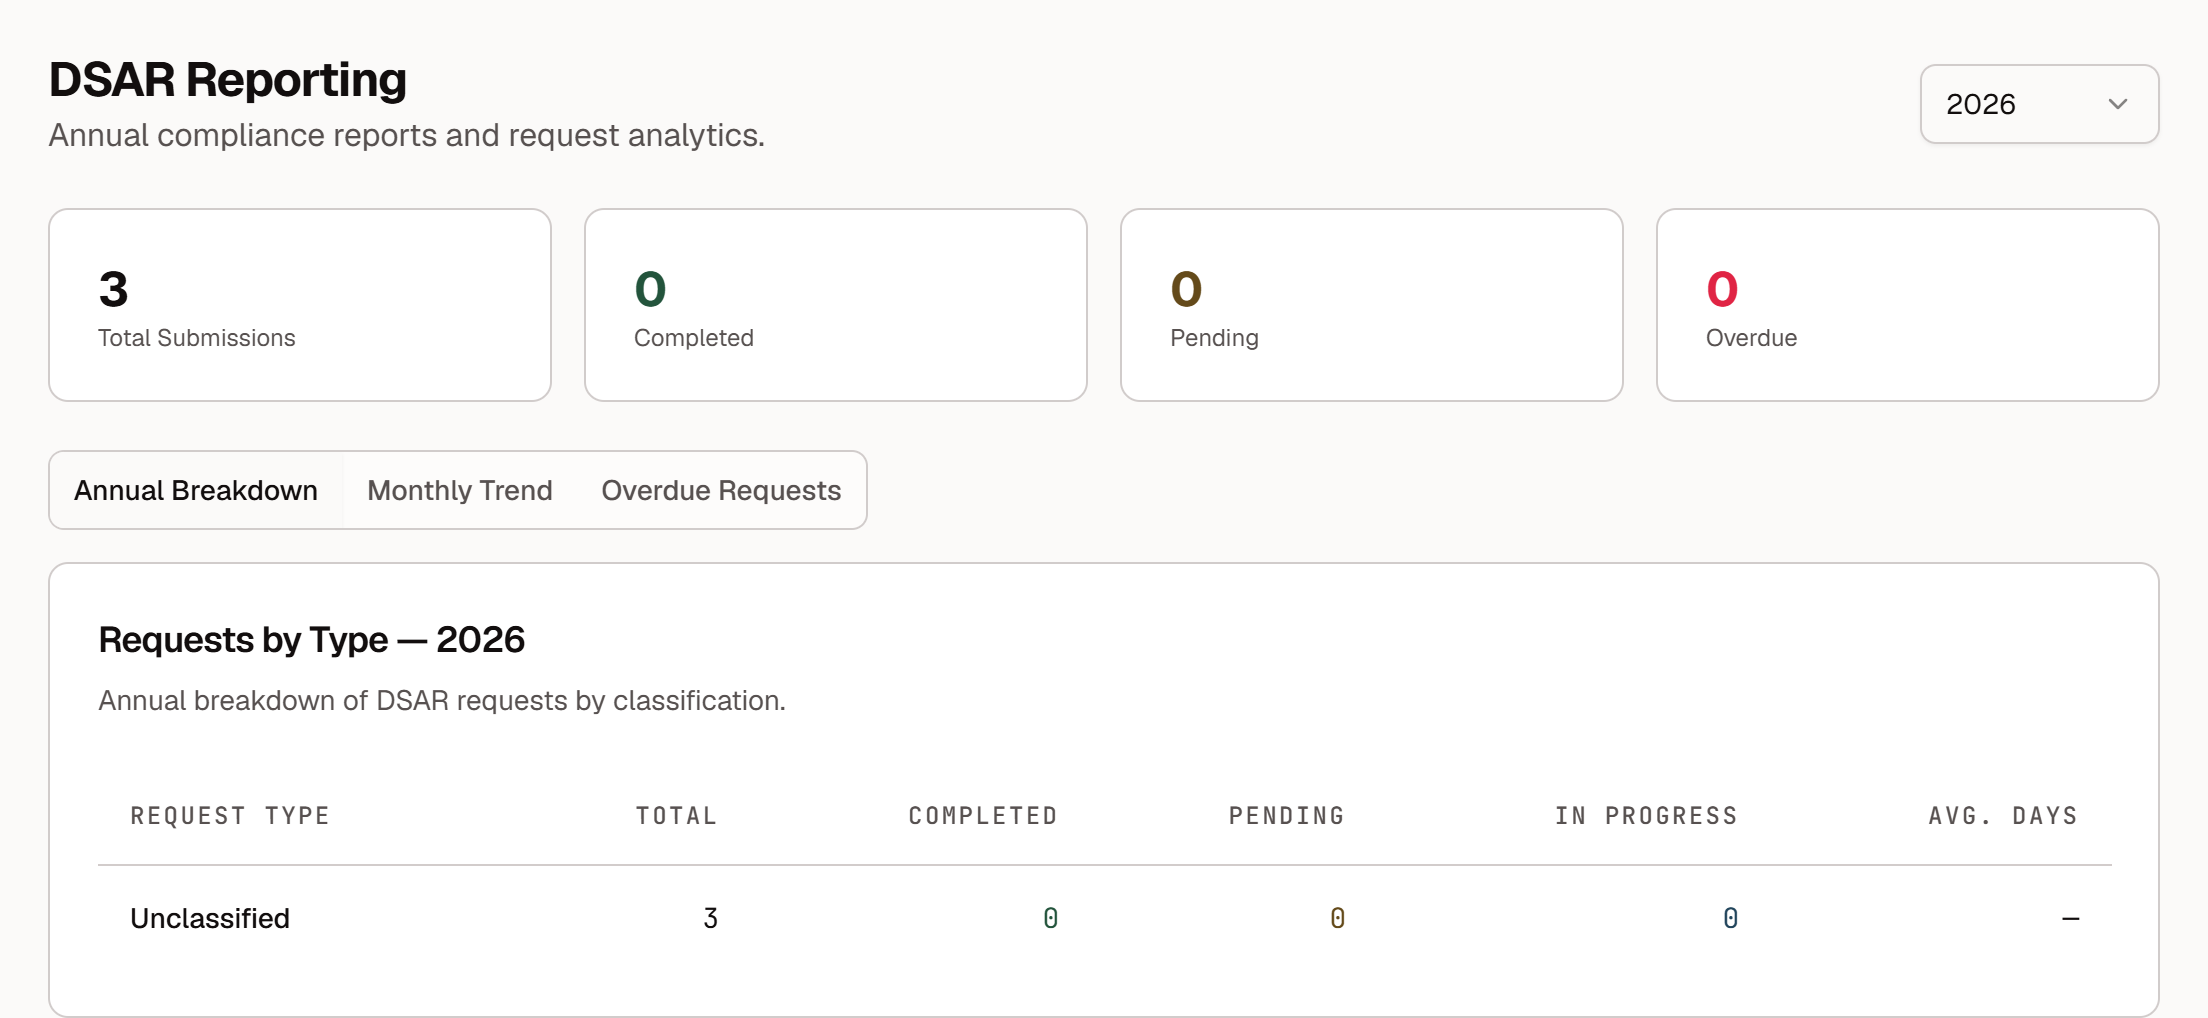
Annual Breakdown: requests by type, with the total, completed, pending, and in-progress counts and the average days to complete
Monthly Trend
Overdue Requests
Automate fulfillment
Some fulfillment steps can be automated through integrations with other platforms. See How to Automate Fulfillment of Data Subject Request (DSR) Portal Requests.
Related articles
How to Generate and Customize a Data Subject Request (DSR) Portal
How to Automate Fulfillment of Data Subject Request (DSR) Portal Requests
How to Ensure Eligibility for Captain Compliance ComplianceShield
How to Publish Your DSR Portal with a Link or an Embed Script
How to Manage Organization Members, Roles, and Notifications