
How to Review and Classify Cookies After a Scan
Every scan of a domain produces a list of cookies. Before a cookie appears on your public cookie list, someone on your team checks its category and approves it. This article explains where that review happens and what each action does.
Review controls disclosure, not blocking. The app treats cookies that are waiting for review as blocked, and keeps them off your public list until you decide.
Before you start
The domain must already be added and scanned. See How to Scan Websites and Manage Domains.
Open the review queue
Select Cookies in the sidebar. The page shows how many cookies need review across your sites, with filters for Needs review, Published, and Removed.
Select Review next to the site.
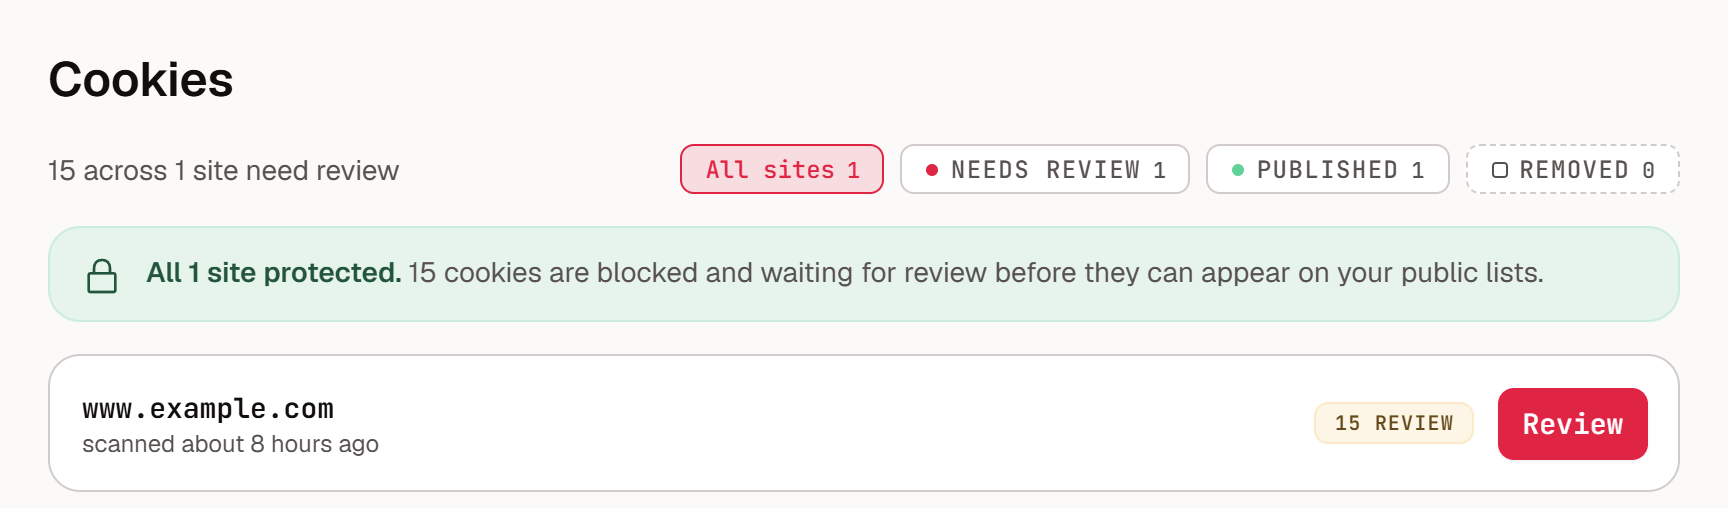
You can open the same page from Scans by selecting the Cookie Management icon on a domain. The notification bell in the top bar also shows a scan alert when cookies are waiting.
What each tab shows
Tab | What it shows |
|---|---|
Overview | Counts by category, first-party and third-party totals, and the full list from the latest scan. |
Needs review | New cookies from the latest scan that are not yet approved, and previously approved cookies that the latest scan did not find. |
Published | The live list that is disclosed on your public cookie page. |
Removed | Cookies confirmed gone or excluded from disclosure. They are kept as history and are still blocked if they reappear. |
Manual | Cookies you added by hand. Scans never change these. |
Recipients | Email addresses that are notified when new or dropped cookies are detected for the site. |
Review new cookies
On the Needs review tab, each new cookie shows its name, cookie domain, and suggested category. Use the category chips above the list to filter it.
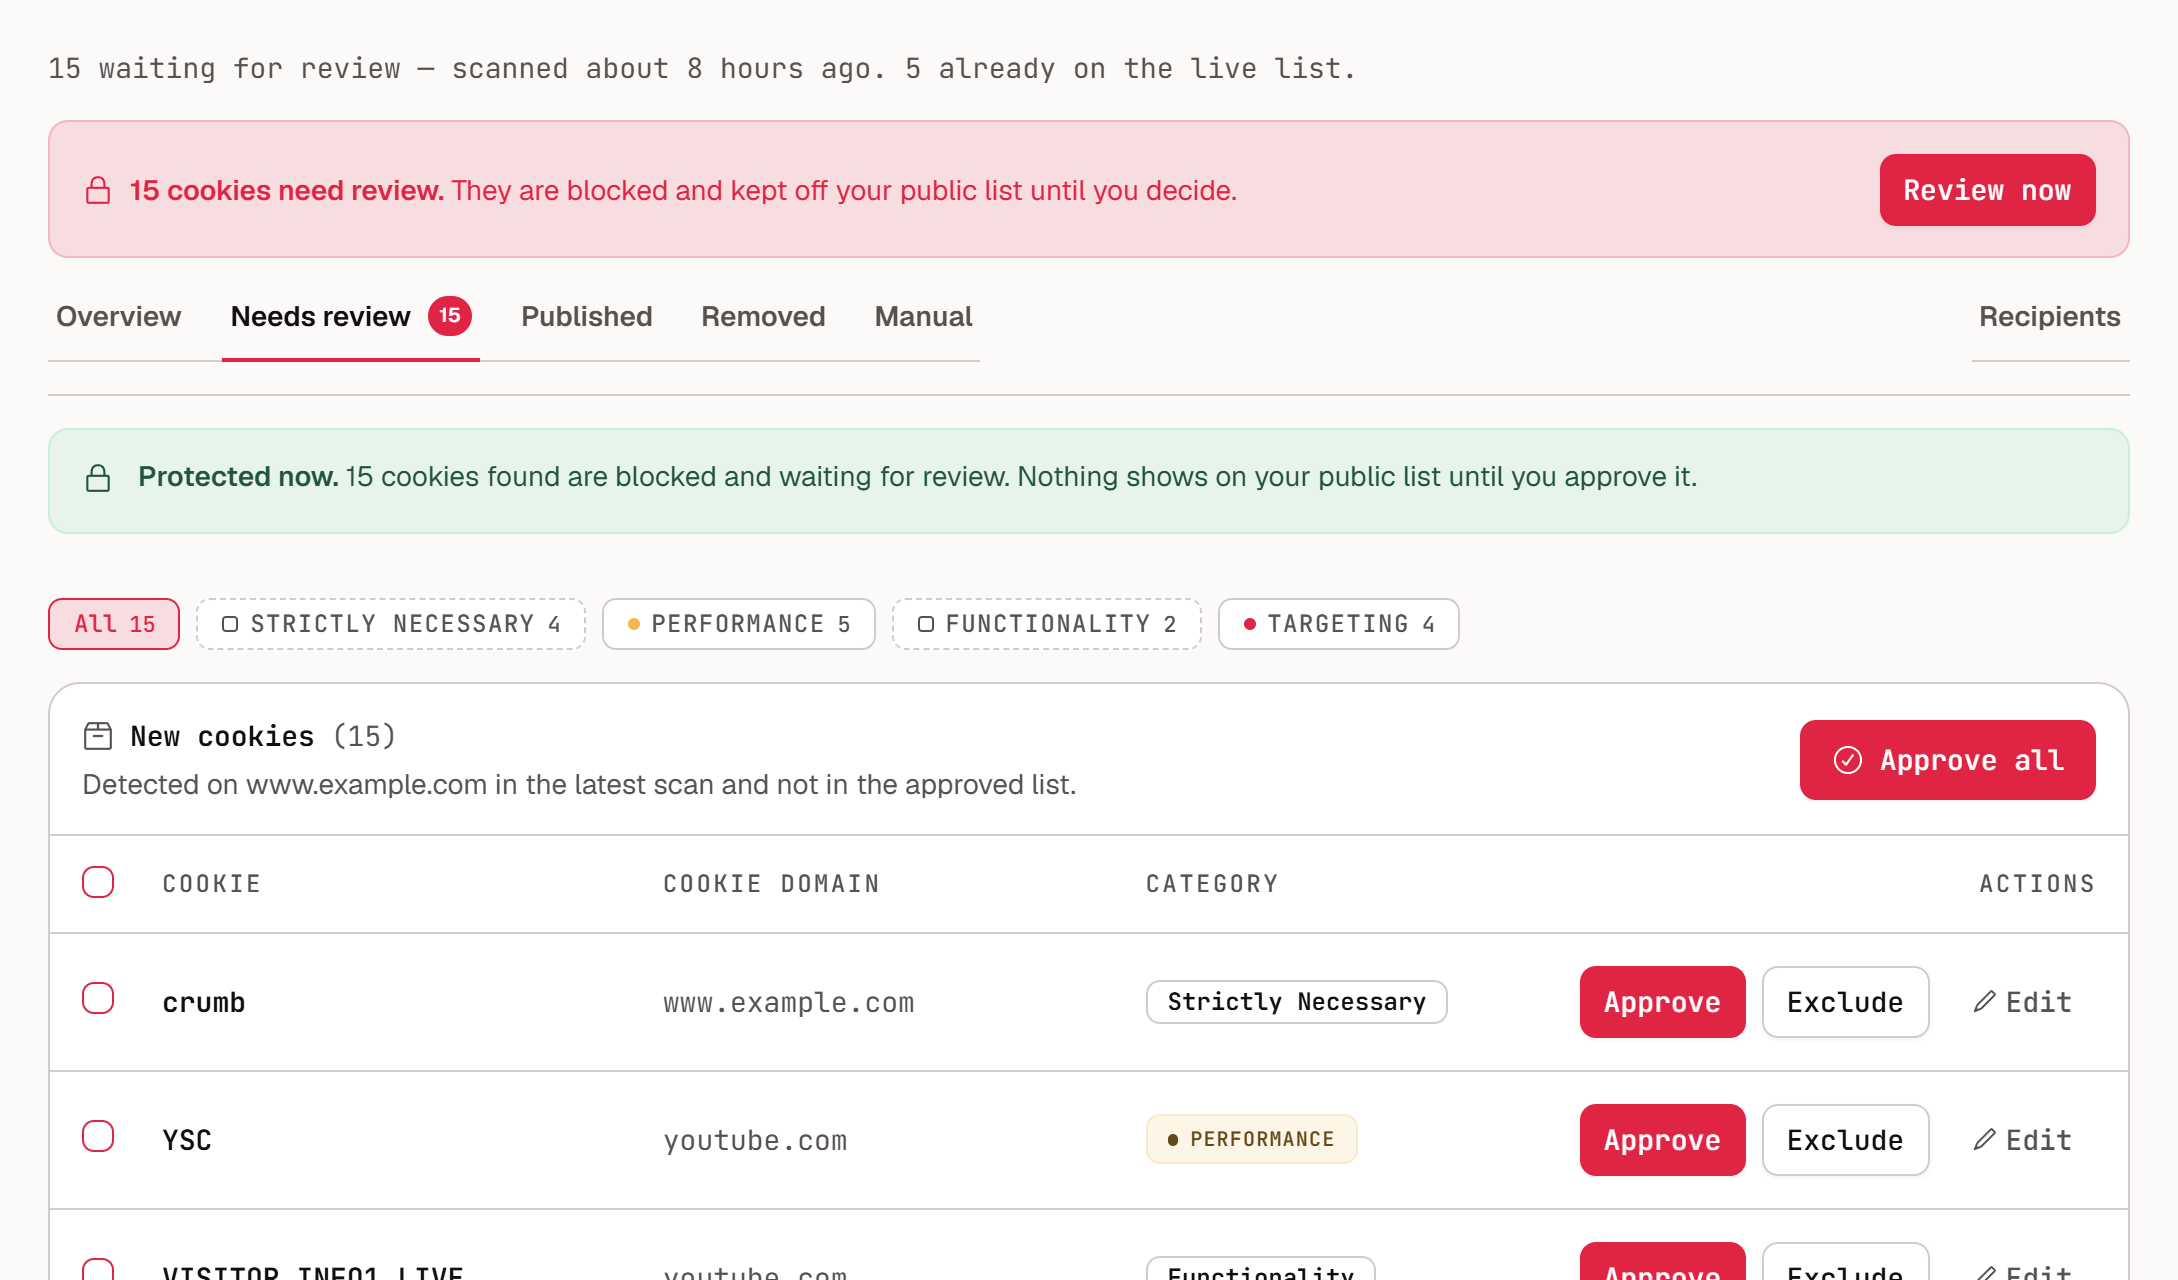
For each cookie:
Check the category. If the category or description is wrong, select Edit, change the Display name, Category, or Description, and select Save.
Select Approve to publish the cookie to the site’s public cookie list. Approval takes effect within seconds.
Select Exclude to keep the cookie off the public list. The cookie moves to Removed immediately, without a confirmation step, and the Removed tab has no restore action, so check before you exclude.
To approve several cookies at once, tick their checkboxes and select Approve selected. Select Approve all only after you have checked every category.
Review cookies that are no longer detected
Below the new cookies, Cookies no longer detected lists previously approved cookies that the latest scan did not find. Review this list after each scan so that your public list does not describe cookies the site no longer sets. Cookies you confirm as gone are kept under Removed.
Choose the right category
Category | Use it for |
|---|---|
Strictly Necessary | Essential site functionality |
Functionality | Preferences and user-experience features |
Performance | Analytics and performance metrics |
Targeting | Advertising, remarketing, and tracking |
Categories drive both the consent banner and your disclosures. A cookie in the wrong category is allowed or blocked under the wrong toggle, so do not leave any cookie Unclassified.
If a cookie arrives unclassified, you can classify it in your own account as described above, or ask your Captain Compliance representative to add it to the global library.
Edit or remove a published cookie
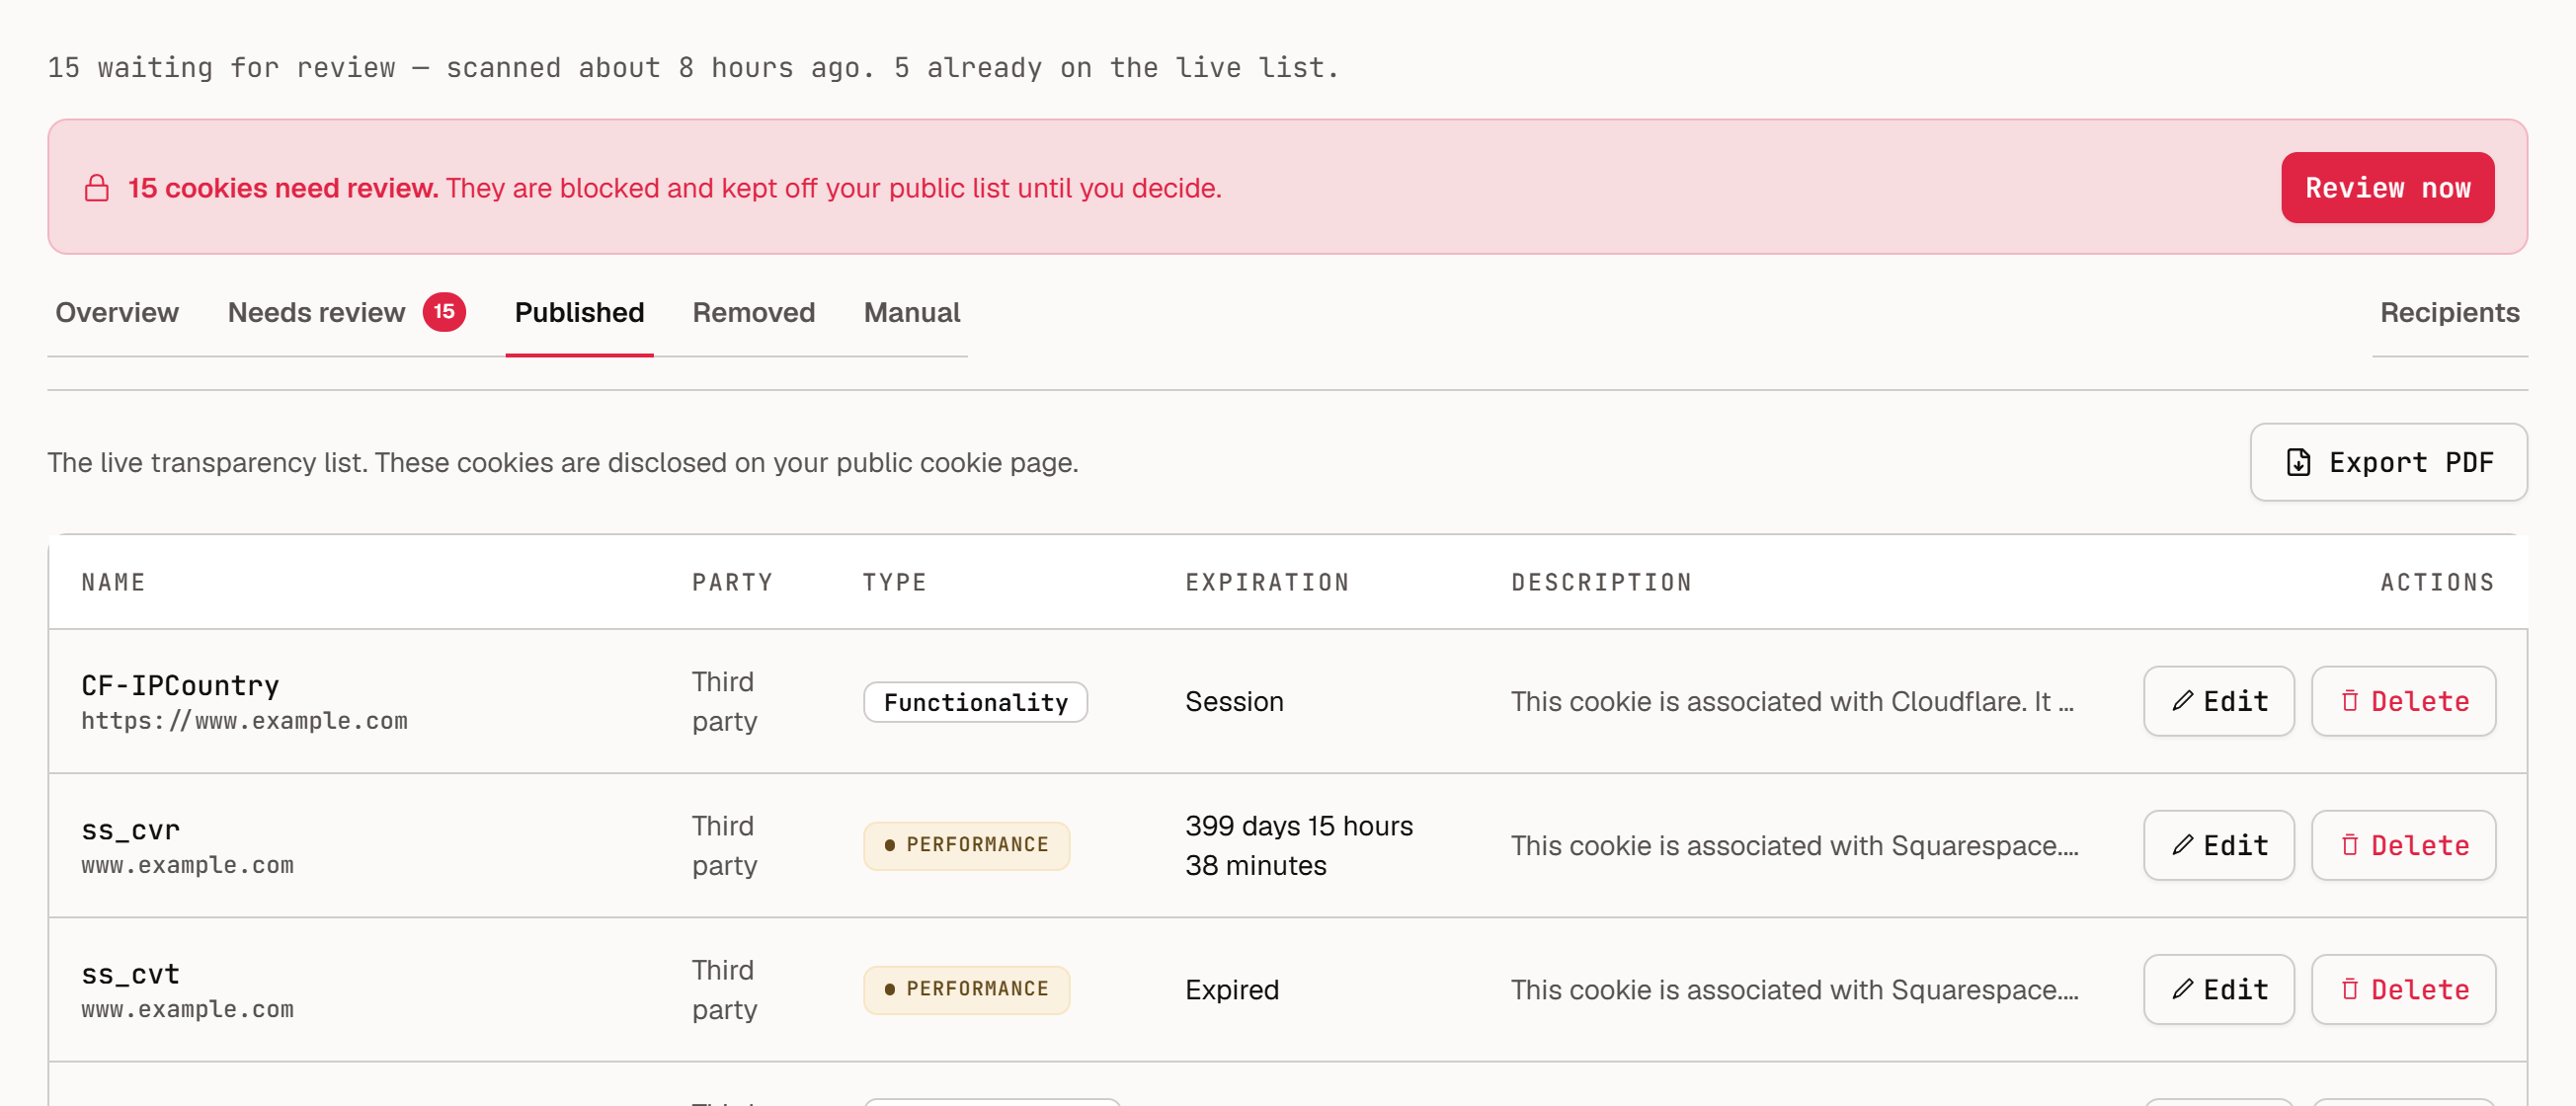
On the Published tab:
Select Edit to change the Name, Cookie Type, Regex (the pattern used to match the cookie name), or Description, and then select Update Cookie.
Select Delete to take the cookie off the list.
Select Export PDF to download the list.
Add a cookie manually
Add a cookie by hand when you know of one that the scanner cannot reach.
Open the Manual tab and select Add cookie.
Enter the Name, Value, Cookie Type, and Description. Set Same Party, Session, Expiration, and Regex as needed.
Select Create Cookie.
Manual cookies are never changed by a scan.
Get notified about changes
On the Recipients tab, add the email addresses of the people who should hear about cookie changes. They are notified whenever new or dropped cookies are detected for the site.
Re-scan after site changes
Run a new scan whenever you add or remove tools on your site. In Scans, select Re-scan on the domain and confirm with Start scan. The scan refreshes the cookie report and preserves the categories you set yourself. New and dropped cookies then appear under Needs review.