
How to Create Regional Privacy Notices and Translations
A single privacy notice rarely fits every visitor. Laws differ by region, and visitors expect to read the notice in their own language. Captain Compliance handles both from one Privacy Policy container: you can vary content by region, add notices for specific countries, and publish translations, all behind one hosted URL. This article explains each option. To create your first notice, see How to Generate and Customize a Privacy Notice.
How regional notices work
A Privacy Policy container holds one or more notices. Each notice is configured for a region and, optionally, for specific countries.
The container has one hosted URL. When a visitor opens it, Captain Compliance loads the notice that matches the visitor’s region and your priority order.
Inside a notice, each section can also be limited to a region, so one notice can show different sections in different places.
Choose an approach
Approach | Use it when |
|---|---|
One notice with regional sections | Most of the notice is the same everywhere, and a few disclosures apply only in certain regions. This is the simplest setup to maintain. |
A separate notice for a region or country | The notice for one region differs substantially, for example because the business operates differently there or counsel has asked for a dedicated notice. |
Translations | The content is the same, and visitors need to read it in another language. Translations can be combined with either approach. |
Show a section only in certain regions
Select Privacy notice in the sidebar of the Captain Compliance app and open your Privacy Policy container.
On the Policies tab, select the (...) menu on the notice and choose Edit Sections.
Select the section, or select the + icon to add a custom section.
Open the section’s Configuration and set its Region.
Make sure Section status is switched on, and save.
Custom sections are the recommended place for region-specific language, because the dynamically generated sections stay under Captain Compliance’s automatic updates.
Add a notice for a region or country
Open your Privacy Policy container and stay on the Policies tab.
Select Add New.
Enter a Name that identifies the audience, for example Privacy Notice (Europe).
Under Type, keep Generated to use Captain Compliance’s automated notice generation.
Under Region, choose Global, Oceania, Europe, America, Asia, or Africa.
Optionally, select Select Countries and choose the countries in that region that the notice applies to. Choose a region first: the country list shows the countries in the selected region. If you choose United States, a Select States field appears. Choose states to limit the notice to them, or leave the field empty to apply the notice nationwide.
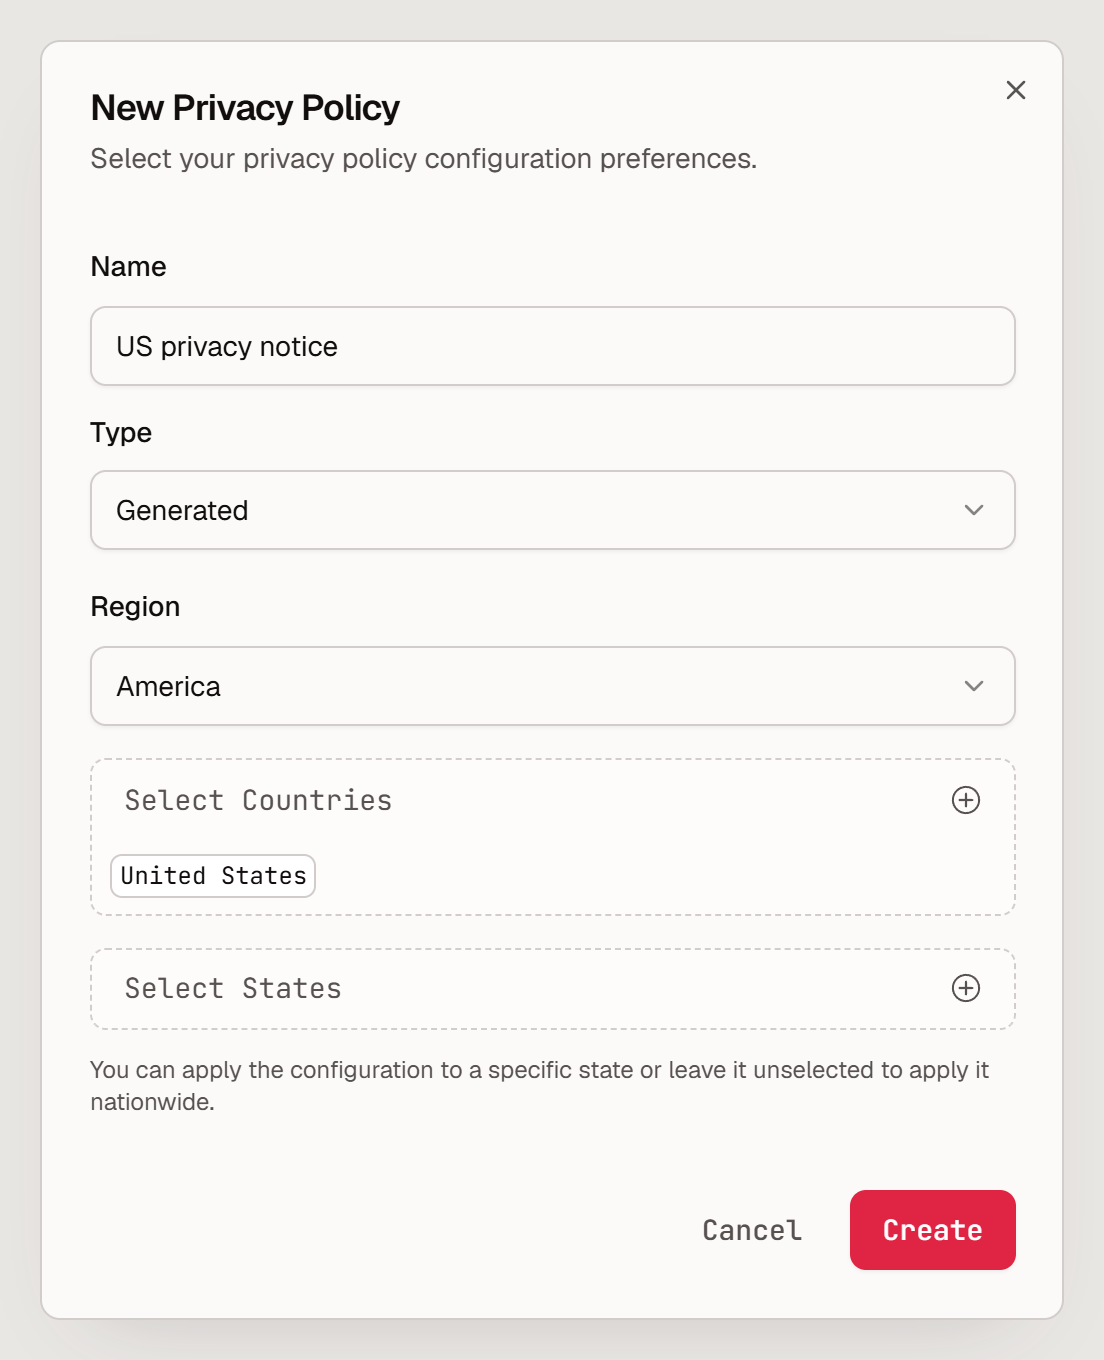
Select Create.
Open the new notice and complete its questionnaire, as you did for your first notice.
Each notice appears on the Policies tab with its status, its priority, and the countries it is configured for. A notice for every country shows Configured for: All countries.
Set the priority order
When more than one notice could apply to a visitor, the priority order decides which one loads.
On the Policies tab, use the region selector above the list to choose the region you want to review. Global is selected by default.
Arrange the notices in the order you want.
Select Save Order.
Keep a Global notice as the fallback, so that visitors from places you haven’t configured still see a notice.
Publish translations
On the Policies tab, select the (...) menu on the notice and choose Edit Sections.
Select Languages.
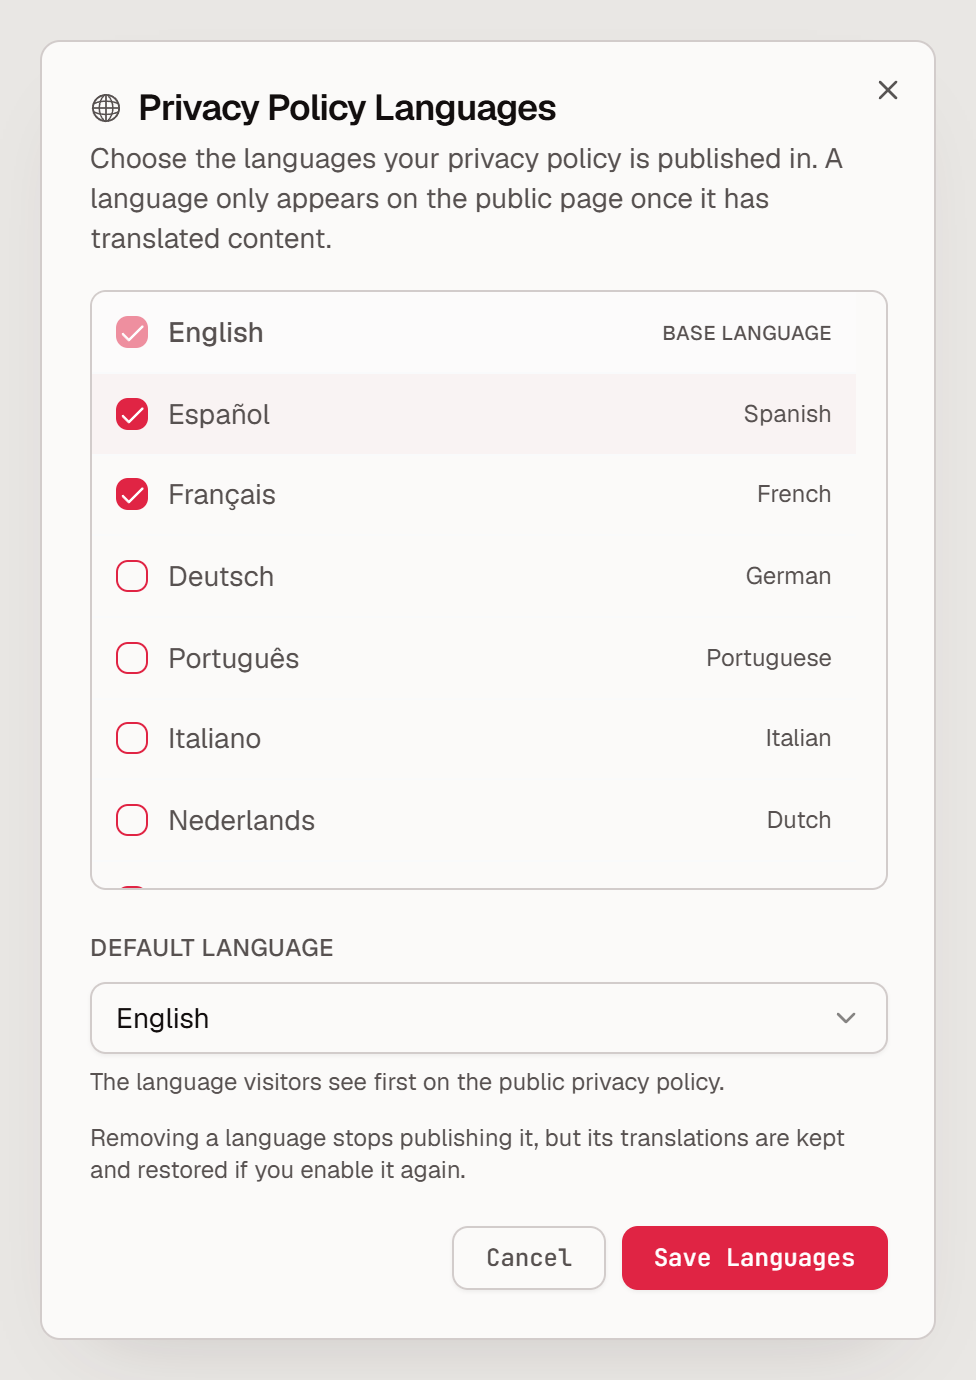
Choose the languages you want to publish and the default language that visitors see first. Twelve languages are available.
Add the translated content for each language.
A language appears on the public page only once it has translated content. Have a fluent reviewer check each translation, because the notice is a legal document in every language it is published in.
Turn off location-based selection
The container’s Configuration tab has a Geolocation setting with a Disable geolocation option. Use it if you don’t want the notice to be chosen by visitor location. Most organizations leave geolocation on.
Pause or remove a notice
The (...) menu on each notice includes two options:
Deactivate Form takes the notice out of use without deleting it.
Remove Configuration removes the notice’s configuration from the container. If you only want to pause a notice, use Deactivate Form instead.
Test what visitors see
Open the container’s Configuration tab, go to Installation Script, and copy the hosted URL.
Open the URL from each region you configured, for example through a VPN or with the help of a colleague in that region, and confirm that the expected notice and sections appear.
View the notice in each published language and confirm that the translation is complete.
Repeat the test after you add a notice, change the priority order, or change a section’s region.
You don’t need a separate link for each region or language. Keep linking to the one hosted URL, or embed it. See How to Embed Your Privacy Notice Using an iFrame.