
How to Create Regional Consent Banner Configurations
A domain can have several consent banner configurations, each aimed at a region or a set of countries. This is how you apply an opt-in model in some places and an opt-out model in others from a single installation. This article explains how regions and priority work, and how to create a regional configuration.
Decide which model each region needs before you start. See How to Choose Between Opt-In and Opt-Out Consent Models and How to Identify Regions Requiring Opt-In Consent Models.
How regional configurations work
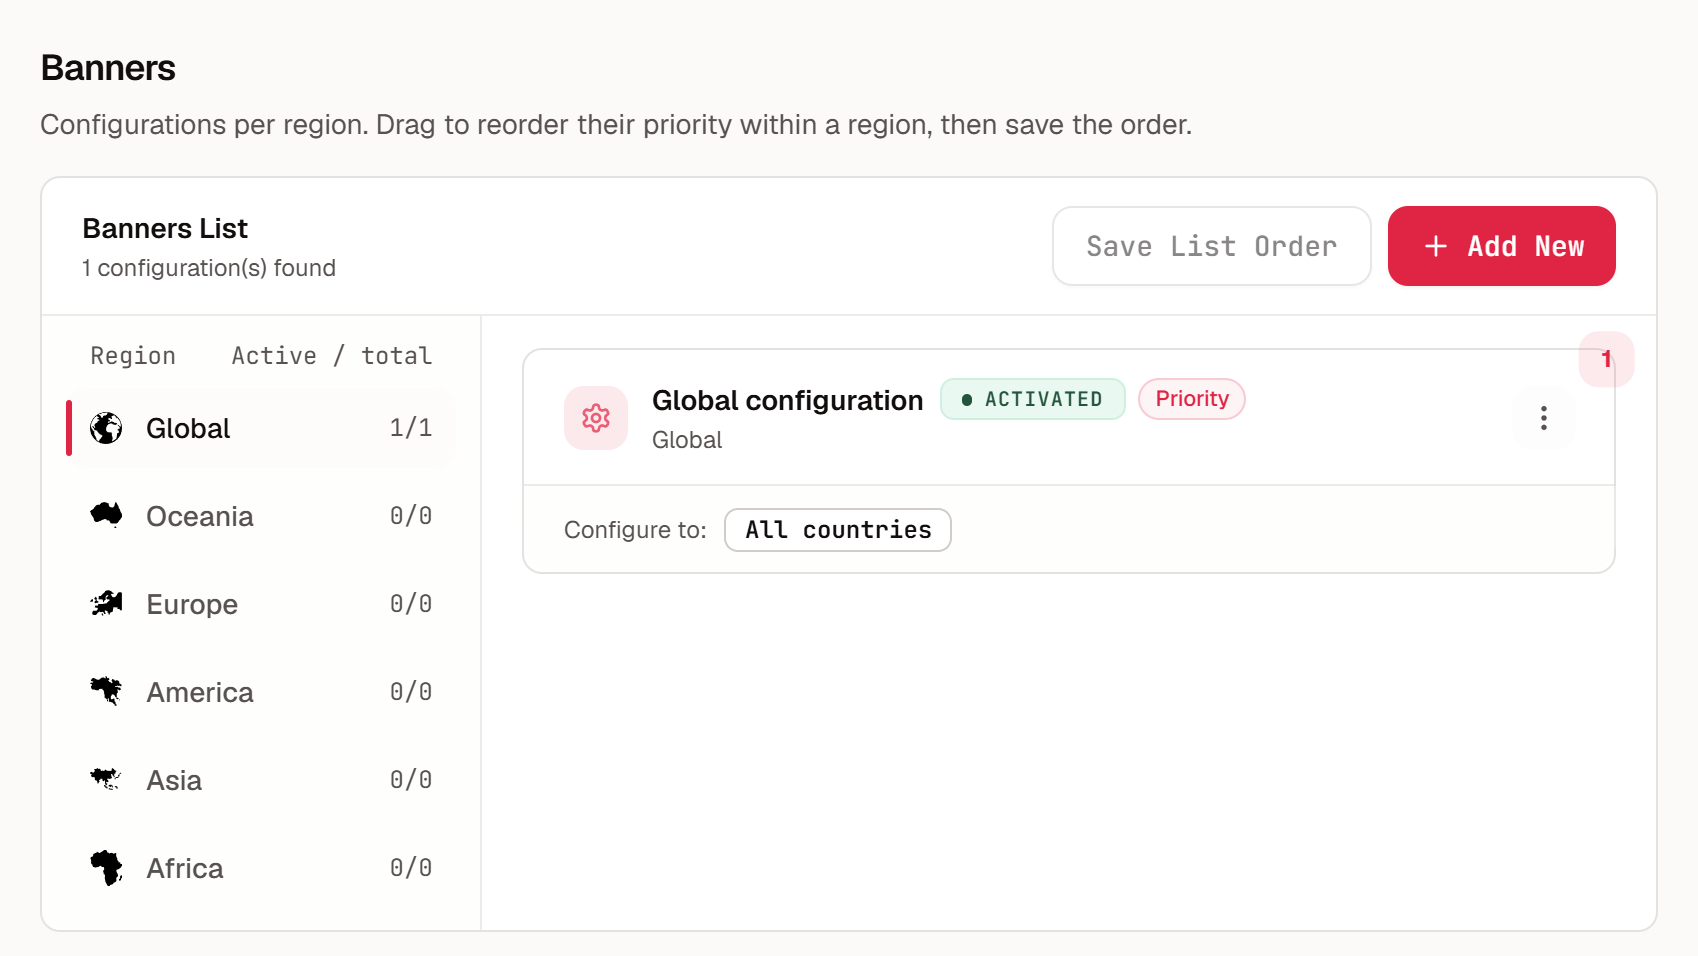
Every domain has a Global configuration, which is set to All countries.
Other configurations belong to one of the regions the app lists: Oceania, Europe, America, Asia, or Africa. A configuration can cover its whole region, only the countries you select, or specific states or provinces within one country.
By default, the consent experience adapts to each visitor’s location, which is detected from their IP address. The Global configuration is the fallback for visitors that no regional configuration covers.
Within a region, configurations are kept in priority order.
Create a regional configuration
Select Consent banner in the sidebar, and then select your domain.
Under Banners, select Add New.
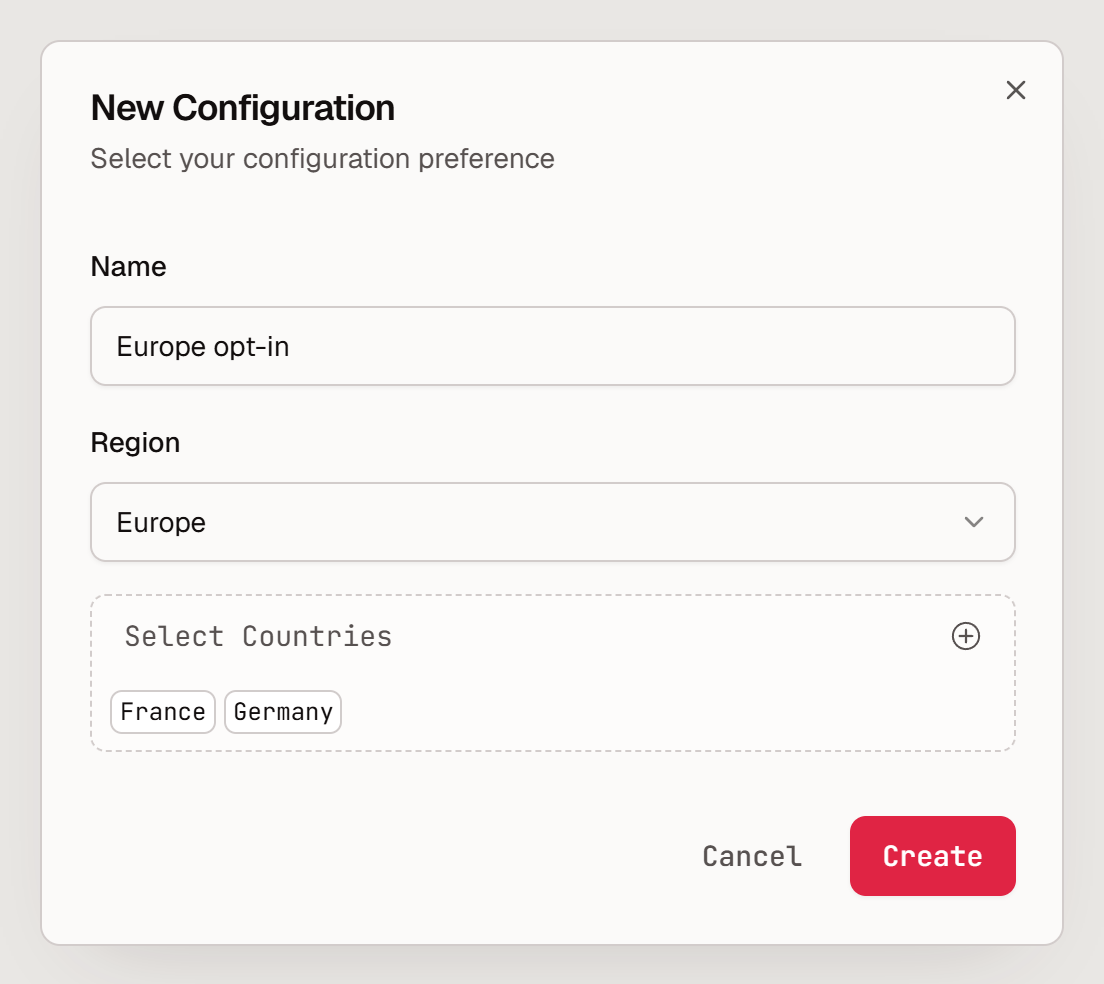
Enter a Name that says what the configuration is for, such as “Europe opt-in”.
Choose a Region.
To limit the configuration to particular countries, choose them under Select Countries. You can search the list by country name. If you choose exactly one country that has them, such as the United States or Canada, a Select States option appears. Choose one or more states or provinces there, or leave it empty to apply the configuration nationwide.
Select Create.
The new configuration appears under its region in the Banners list. The list shows how many configurations each region has and how many of them are active.
State-level configurations are how you apply an opt-in model in particular U.S. states while the rest of the country stays opt-out. For the states that organizations often treat this way, see How to Identify Regions Requiring Opt-In Consent Models.
Set the consent model
Open the configuration’s menu (the three dots) and select Open Playground.
Select the Cookie settings scene.
Under Categories, set the default for each category toggle.
Select Save, and then select Publish.
Model | Category defaults |
|---|---|
Opt-in | Functionality, Performance, and Targeting are off. Nothing non-essential is allowed until the visitor allows it. |
Opt-out | Functionality, Performance, and Targeting are on. Visitors can turn categories off. |
Strictly Necessary is always on. If the configuration uses bucket mode, set the Default position of each bucket instead: see How to Use Bucket Mode to Customize Consent Categories and GPC Behavior.
If you deploy through Google Tag Manager with the recommended consent scope, the same defaults decide what Google Consent Mode receives before the visitor chooses. See How Captain Compliance Works with Google Consent Mode.
Design the banner for the region
Each configuration has its own layout, text, and languages. See How to Customize Your Consent Banner in the Banner Editor. To start from an existing design, select Copy Configuration in that configuration’s menu and adjust the copy.
Set priority within a region
When a region has more than one configuration, drag the configurations into priority order in the Banners list, and then select Save List Order.
Deactivate or remove a configuration
To take a configuration out of service without deleting it, open its Playground and turn off Status under Global settings.
To delete it, select Remove Configuration in its menu.
Serve one experience to everyone
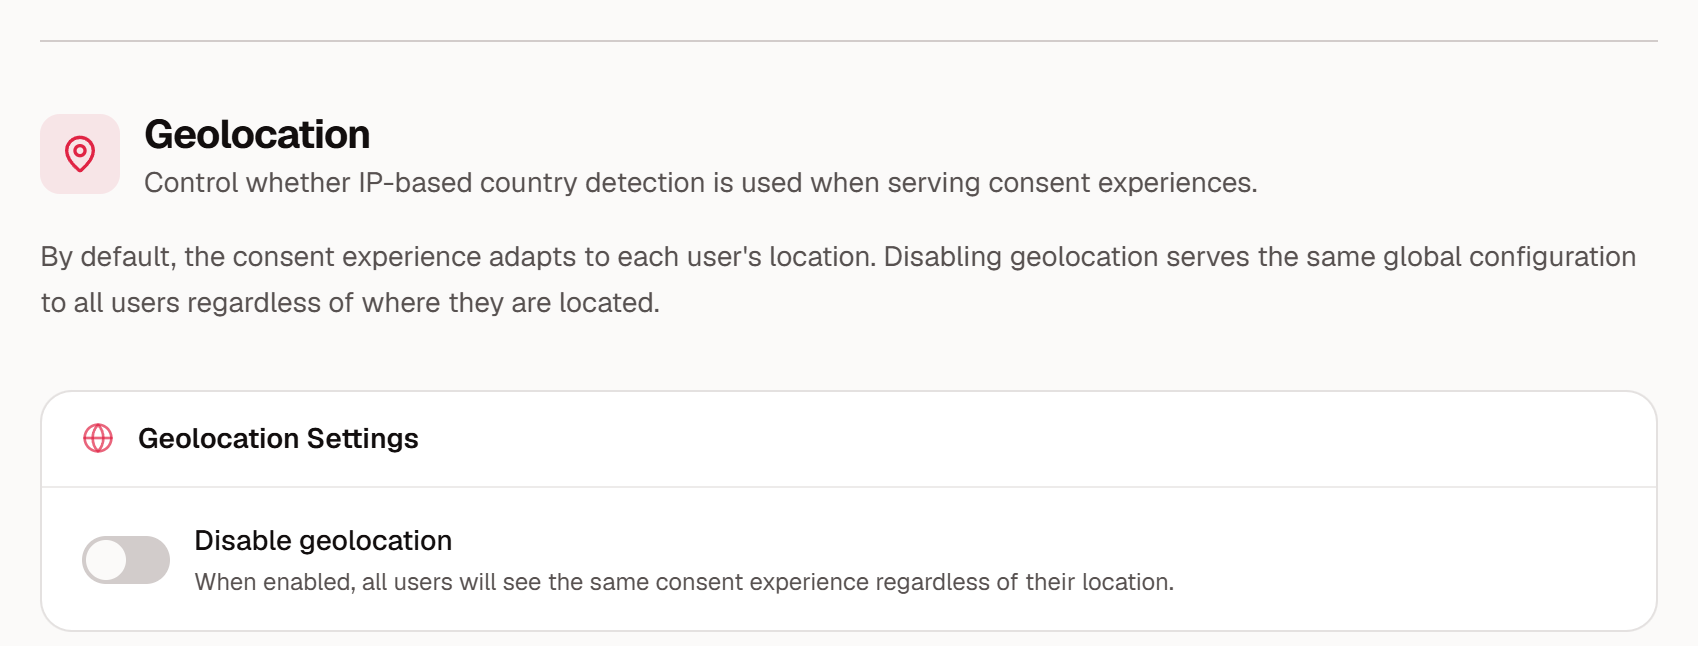
To ignore location entirely, go to Setup → Geolocation on the domain’s Consent banner page and turn on Disable geolocation. The same global configuration is then served to all visitors, wherever they are.
Test each region
Test from every region you target, with and without a stored choice. See How to Test Consent Banner Configuration & Behavior. If you deploy through Google Tag Manager, also see How to Test Your GTM Consent Setup.