
How to Customize Your Consent Banner with Custom HTML and CSS
The banner editor’s Standard mode covers layout, text, colors, and position. When you need more than those options, Custom Code Mode lets you edit the banner’s HTML and CSS directly. This article explains when to use it, what each of the eight files is for, and how to edit them safely.
When to use custom code
You need the banner to match your brand’s typography, spacing, or component styles exactly.
You need to change the banner’s structure, for example to reorder its parts or add an element.
The options in Standard mode do not produce the layout you need.
Start with Standard mode, and move to custom code only for what it cannot do. See How to Customize Your Consent Banner in the Banner Editor. Custom code needs someone who is comfortable with HTML and CSS.
Open the code editor
In the Captain Compliance app, select Consent banner in the sidebar, and select the domain.
Under Banners, select the configuration that you want to change. The Consent banner editor opens.
At the top of the editor, select Dev.
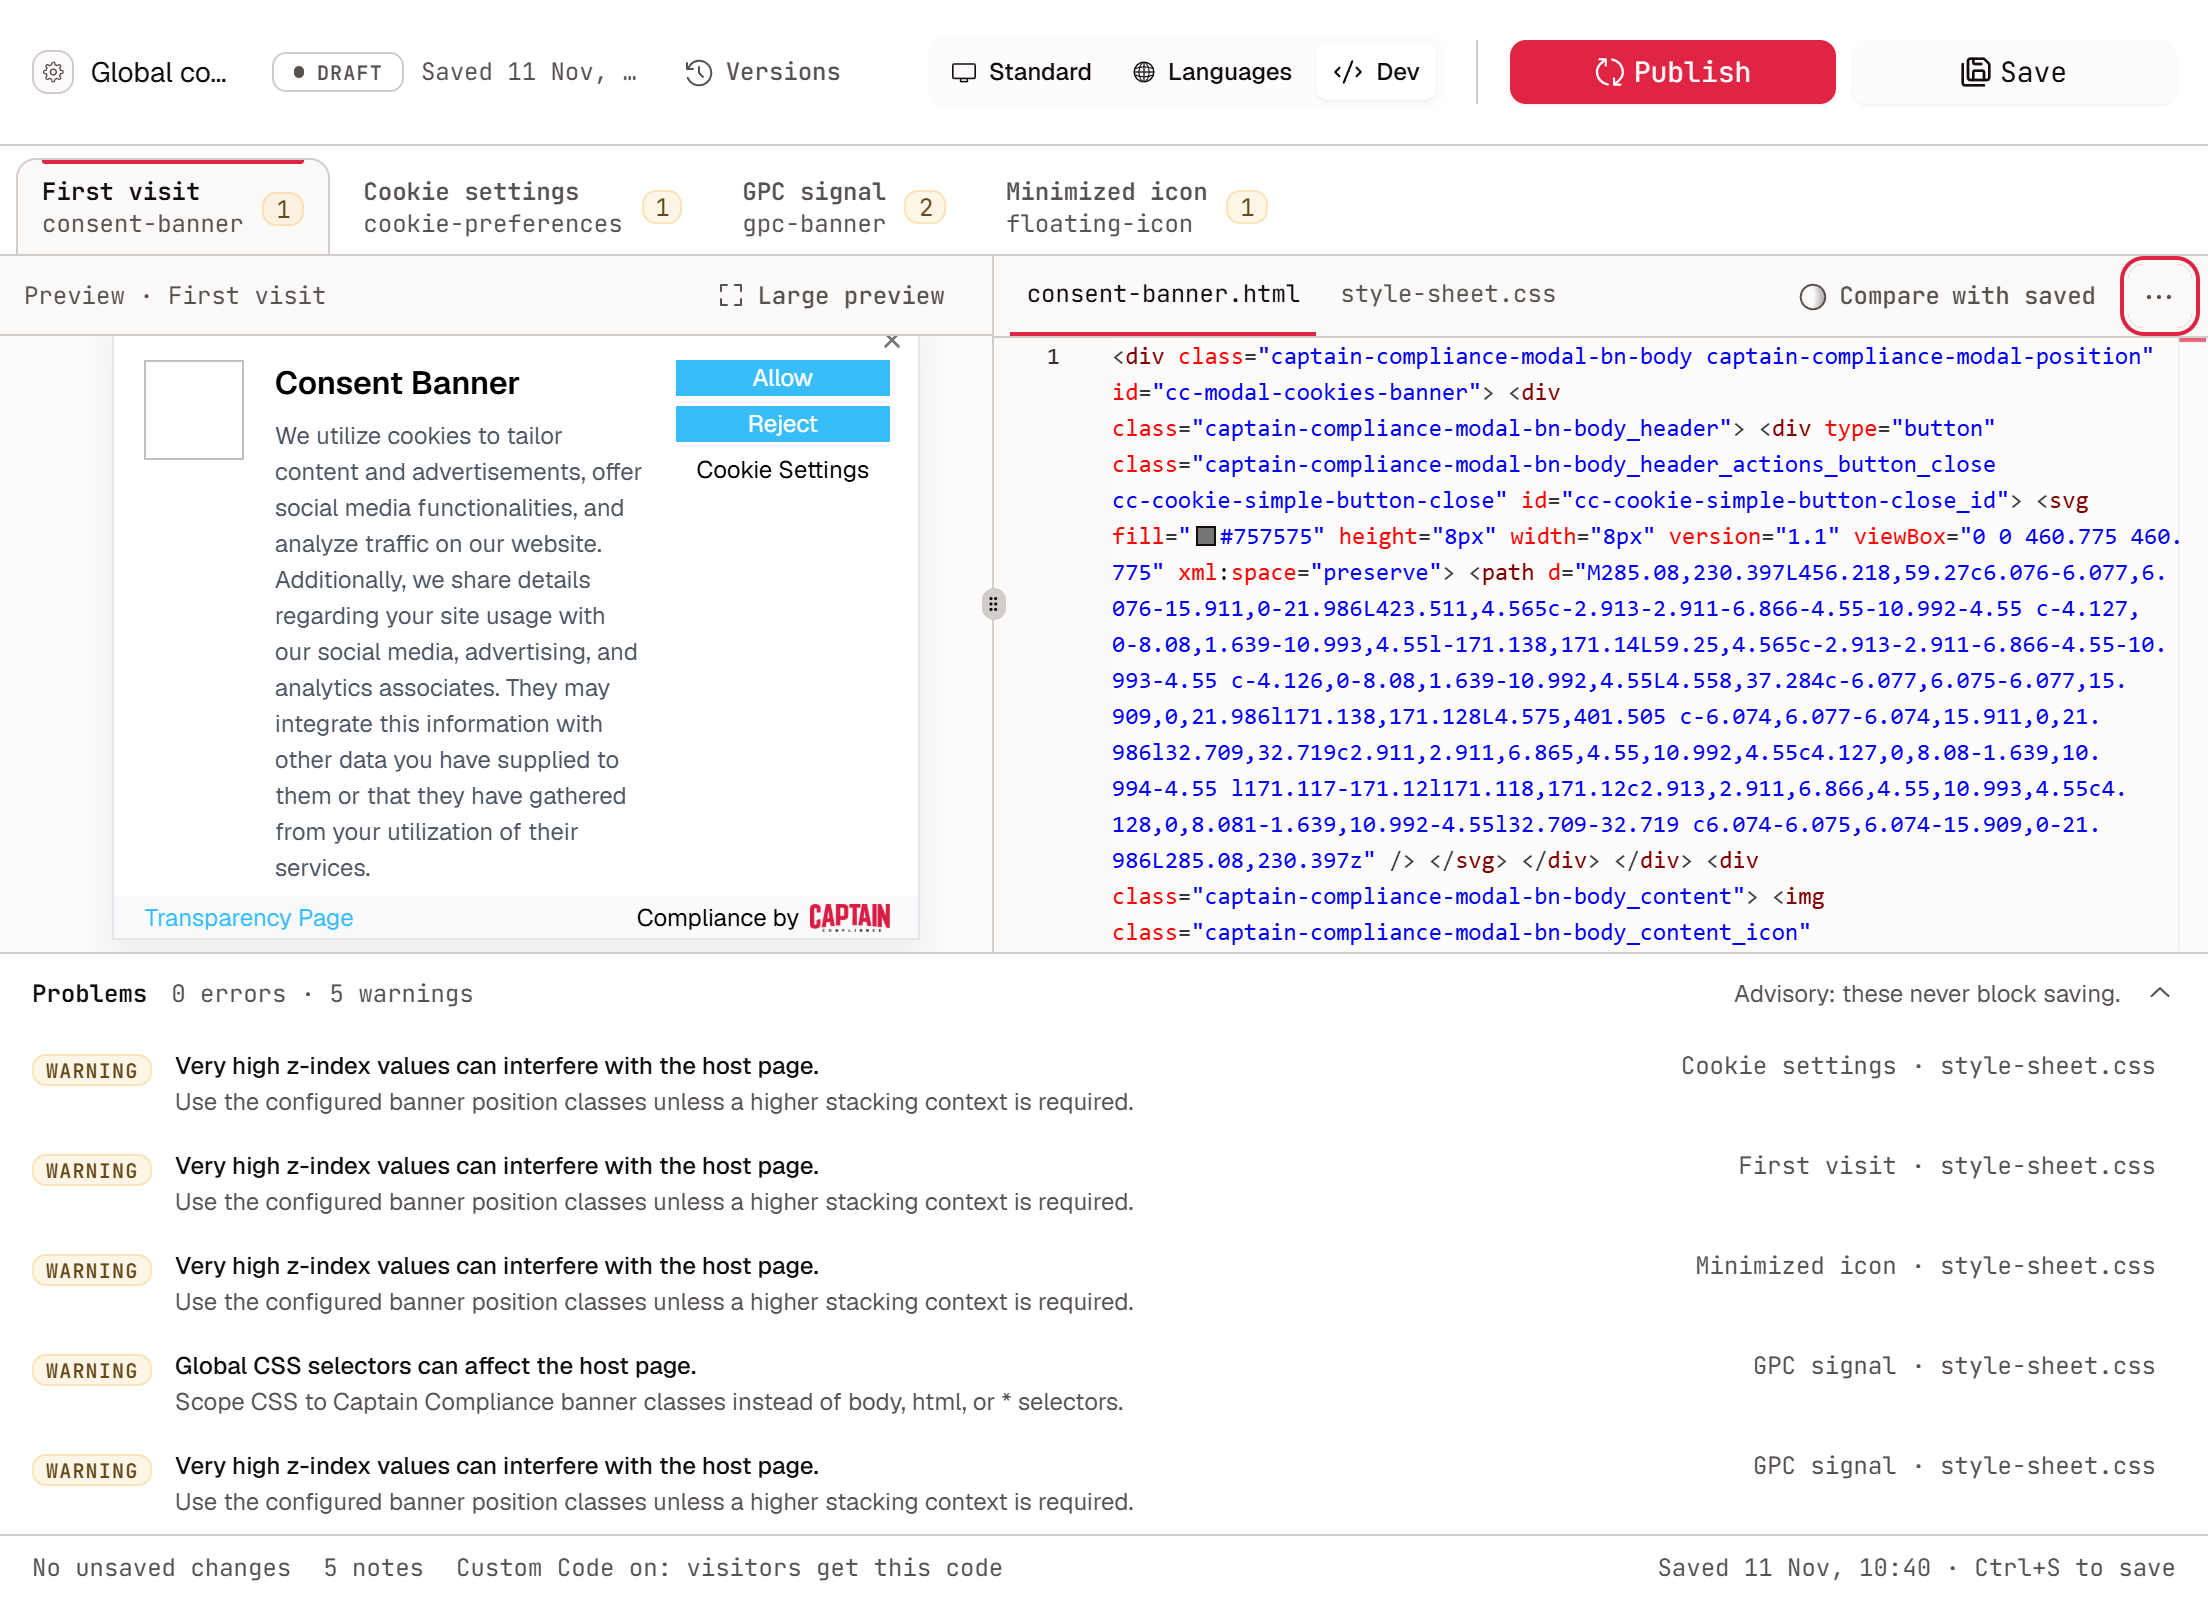
The Dev view of the consent banner editor:
What the eight files are for
The Dev view has four scenes. Each scene has one HTML file and one CSS file, which makes eight files in total.
Scene | Files | What it controls |
|---|---|---|
First visit |
| The banner that a visitor sees on arrival, with the Allow, Reject, and Cookie Settings buttons |
Cookie settings |
| The preferences panel, with a toggle for each category |
GPC signal |
| The notice that appears when the browser sends a Global Privacy Control (GPC) signal |
Minimized icon |
| The small icon that reopens the preferences after the banner closes |
Each scene has its own style-sheet.css. The four files share a name but are separate.
Edit, check, and save
Select a scene, and then select its HTML or CSS file.
Edit the code. The Preview pane beside the code shows the result. Select Large preview for a bigger view.
Read the Problems panel under the code. Its notes are advisory and never block saving.
Select Compare with saved to review your changes against the saved version.
Select Save.
The … menu above the code has two file actions: Format this file, and Download backup, which saves all eight files as a .zip file. Download a backup before a large change.
Turn Custom Code Mode on
Visitors get your code only while Custom Code Mode is on for the configuration.
At the top of the editor, select Standard.
Open Global settings.
Under Design source, turn on Custom Code Mode.
Select Save, and then select Publish.
The Global settings panel with Custom Code Mode on:
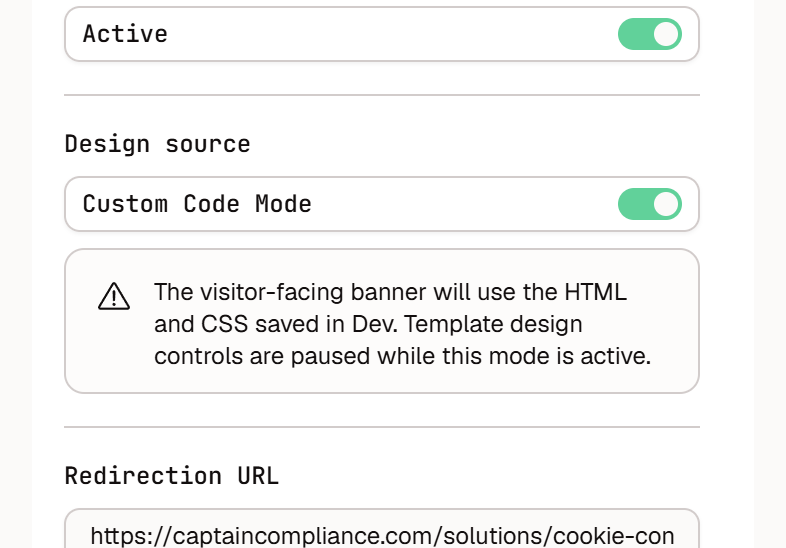
While the mode is on, the banner uses the HTML and CSS saved in Dev, and the design controls in Standard mode are paused. The mode and position settings still apply. To go back to the template design, turn Custom Code Mode off and publish again.
IDs to keep
The banner script finds its buttons and containers by their id attributes. You can restyle and move these elements, but keep their IDs. A control whose ID is missing stops working.
File | IDs to keep |
|---|---|
|
|
|
|
|
|
|
|
The default files also give IDs to the title, description, image, and transparency link. Keep those too, so that the banner can fill in your text and links.
Good practice
Scope every CSS rule to the Captain Compliance classes. Do not style
body,html, or*. The Problems panel flags global selectors.Keep the position variables, such as
--compliance-position-bottom, in your CSS. The editor’s position settings fill them in.Avoid raising
z-indexvalues unless the banner is hidden behind part of your page.Put every style that the banner needs in these files. The banner is isolated from your site’s own styles, so your site’s CSS does not reach it.
Keep Reject as easy to see and use as Allow. A banner that hides or plays down the reject option can be treated as a dark pattern.
Custom code belongs to one configuration. If you use regional configurations, repeat the change in each one that needs it.
After you publish, test every scene and every language that you serve. See How to Test Consent Banner Configuration & Behavior.