
How to Install the Captain Compliance Consent Banner on Next.js, React, and Other Single-Page Apps
This article explains how to add the Captain Compliance consent banner to a single-page app, such as a site built with Next.js or React. In these apps the browser loads one HTML document and the framework changes pages without a full reload, so the script is added once, at the root of the app.
Before you start
Add the site’s domain in Captain Compliance and set up its consent banner. See How to Set Up Captain Compliance: A Step-by-Step Checklist.
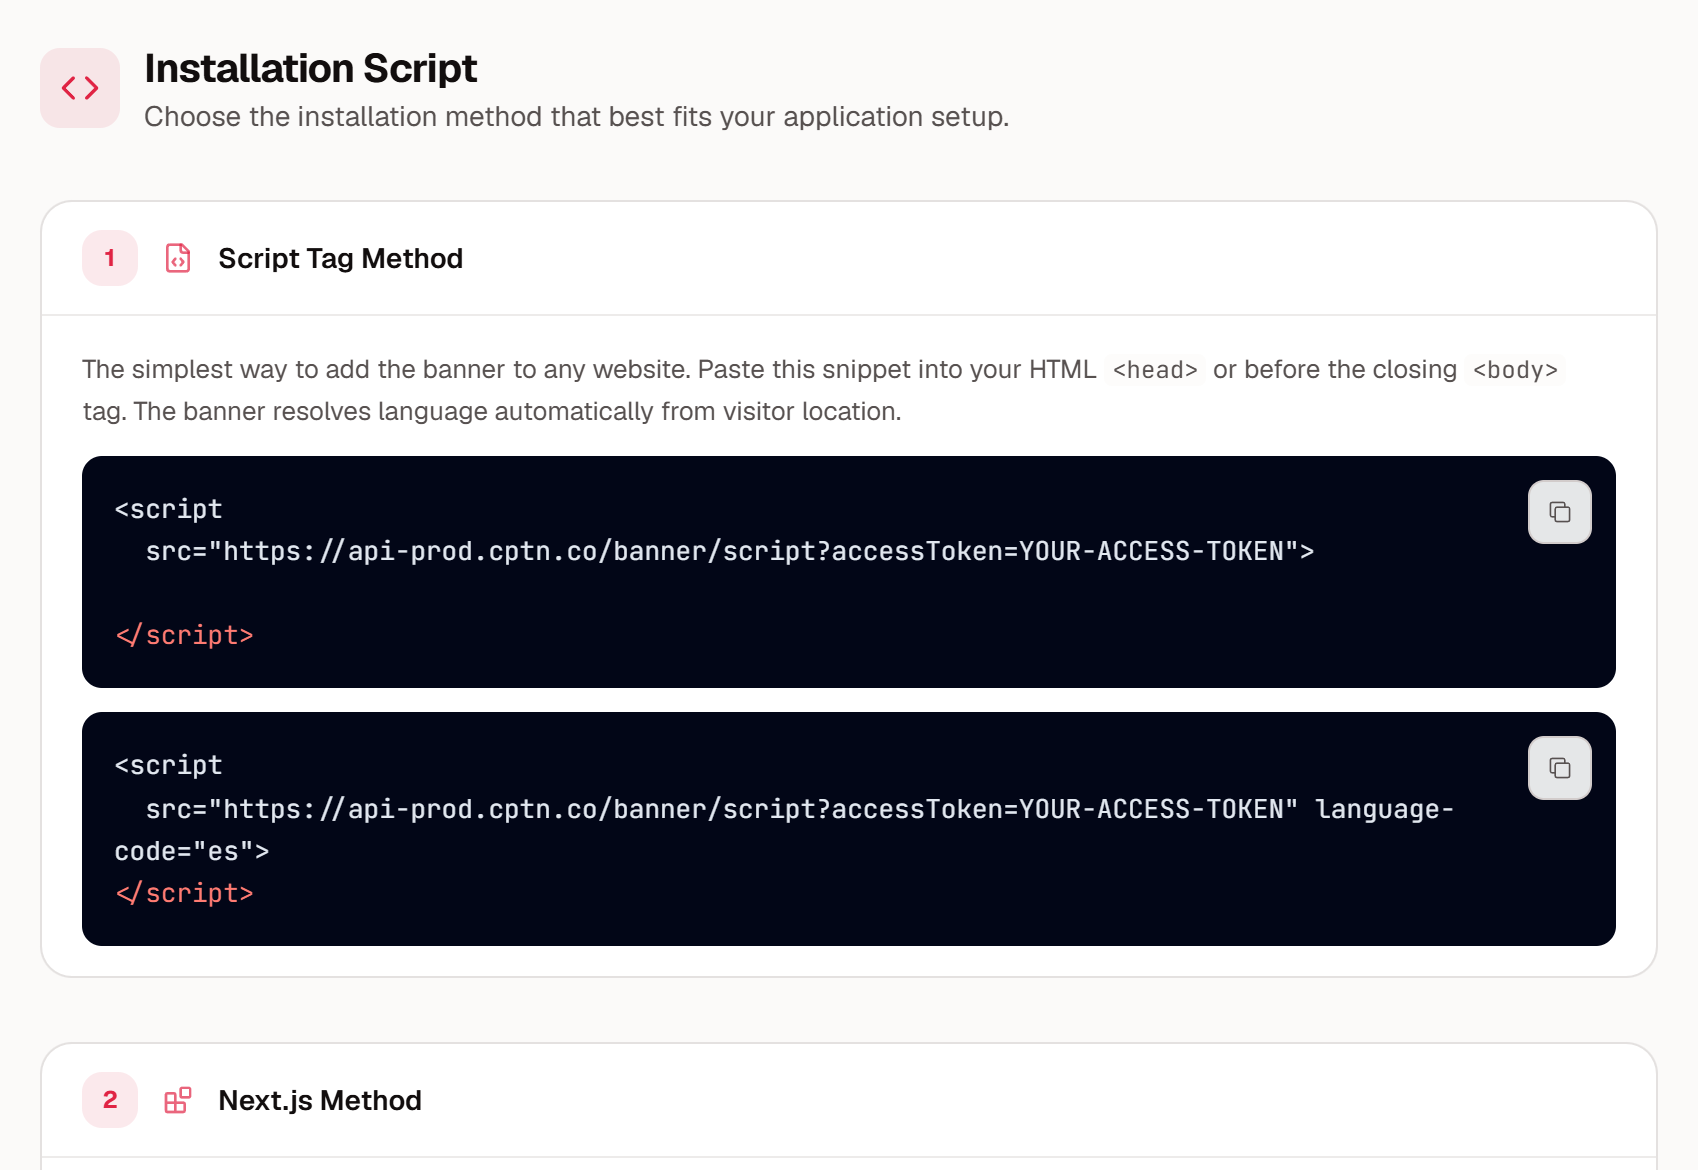
Open the Installation script section for that domain. In the Captain Compliance app, select Consent banner in the sidebar, select the domain, and under Setup select Installation script. The section has a snippet for each method below, already filled in with your access token.
The script runs only on the domain it was issued for, with or without www. On a subdomain, the banner appears only if that subdomain has been added in Captain Compliance. On any other address, the banner does not appear. For example, the banner does not appear on localhost or on a preview deployment address. Test on the domain that you added in Captain Compliance. To add a domain or subdomain, see How to Scan Websites and Manage Domains.
The Installation script section in the Captain Compliance app:
Next.js
Use the Next.js Method snippet. It loads the script with the next/script component in the root layout of an App Router project.
// app/layout.tsx
import Script from 'next/script'

export default function RootLayout({
  children,
}: {
  children: React.ReactNode
}) {
  return (
    <html lang="en">
      <body>
        {children}
        <Script
          src="https://api-prod.cptn.co/banner/script?accessToken=YOUR-ACCESS-TOKEN"
          strategy="afterInteractive"
        />
      </body>
    </html>
  )
}
In a Pages Router project, add the same Script component to pages/_app.tsx.
React
Use the React Method snippet. It adds the script from the root component when the app starts.
// src/App.tsx
import { useEffect } from 'react';

function App() {
  useEffect(() => {
    const script = document.createElement('script');
    script.src = "https://api-prod.cptn.co/banner/script?accessToken=YOUR-ACCESS-TOKEN";
    script.setAttribute('access-token', 'YOUR-ACCESS-TOKEN');
    script.async = true;
    document.body.appendChild(script);
    return () => {
      document.body.removeChild(script);
    };
  }, []);

  return (
    <div>
      {/* Your app content */}
    </div>
  );
}

export default App;
Keep this code in the root component, so that it runs once and not on every route change.
Other frameworks
For Vue, Angular, Svelte, and static site generators, use the Script Tag Method snippet. Paste it into the head of the HTML document that the app loads, which is usually index.html or the framework’s document template.
<script src="https://api-prod.cptn.co/banner/script?accessToken=YOUR-ACCESS-TOKEN"></script>Notes for single-page apps
Load the script once. Do not add it from components that mount on every page.
The banner script can only hold scripts that load after it. If you use Auto Blocking or Strict Mode, load the Captain Compliance script before other third-party scripts. See How to Block Scripts Before Consent with Auto Blocking and Strict Mode.
Scripts that your own code loads later, such as analytics started from a component, need consent logic of their own. See How to Gate Non-Essential Scripts and Beacons Using Explicit Consent Logic.
Keep the Cookie Preferences link in a part of the page that stays mounted, such as the root layout. The banner connects to the element with the ID
id-open-settings-ccwhen it starts. See How to Add a “Cookie Preferences” Option to Your Website Footer.The app recommends keeping the access token in an environment variable instead of typing it into the code.
If your app sends a Content Security Policy header, allow the Captain Compliance origins. See How to Configure a Content Security Policy (CSP) for Captain Compliance.
Install through Google Tag Manager instead
If the app already loads GTM, you can load the banner from GTM instead of adding the script in code. Add the Captain Compliance CMP template to the container, enter the access token for the domain, and set the tag to fire on Consent Initialization - All Pages. See How to Install and Configure the Captain Compliance CMP Template in GTM.
Use one method only. If you install through GTM, do not also paste the script into the site.
Confirm the banner is live
Deploy the app, and open it on the domain that you added in Captain Compliance, in a private or incognito browser window.
Confirm that the banner appears, and try Allow, Reject, and Cookie Settings.
In the browser’s developer tools, open the Network tab, reload the page, and confirm that the request to
api-prod.cptn.cosucceeds.Move between a few pages in the app and confirm that the banner does not reappear after you choose.
If the banner does not appear, see How to Troubleshoot a Consent Banner That Does Not Appear or Respond. For a full test plan, see How to Test Consent Banner Configuration & Behavior.
Related articles
How to Install and Configure the Captain Compliance CMP Template in GTM
How to Gate Non-Essential Scripts and Beacons Using Explicit Consent Logic
How to Block Scripts Before Consent with Auto Blocking and Strict Mode
How to Add a “Cookie Preferences” Option to Your Website Footer
How to Configure a Content Security Policy (CSP) for Captain Compliance
Developer Reference: Captain Compliance Events, Cookies, and Identifiers
How to Troubleshoot a Consent Banner That Does Not Appear or Respond