
How to Install the Captain Compliance Consent Banner on Shopify
This article explains how to add the Captain Compliance consent banner to a Shopify store by placing the script in the theme’s code. No app is required. Once the script is in place, Captain Compliance also passes each visitor’s choice to Shopify’s Customer Privacy API automatically.
Before you start
Add the store’s domain in Captain Compliance and set up its consent banner. Use the domain that customers see, which is the primary domain in Shopify. See How to Set Up Captain Compliance: A Step-by-Step Checklist.
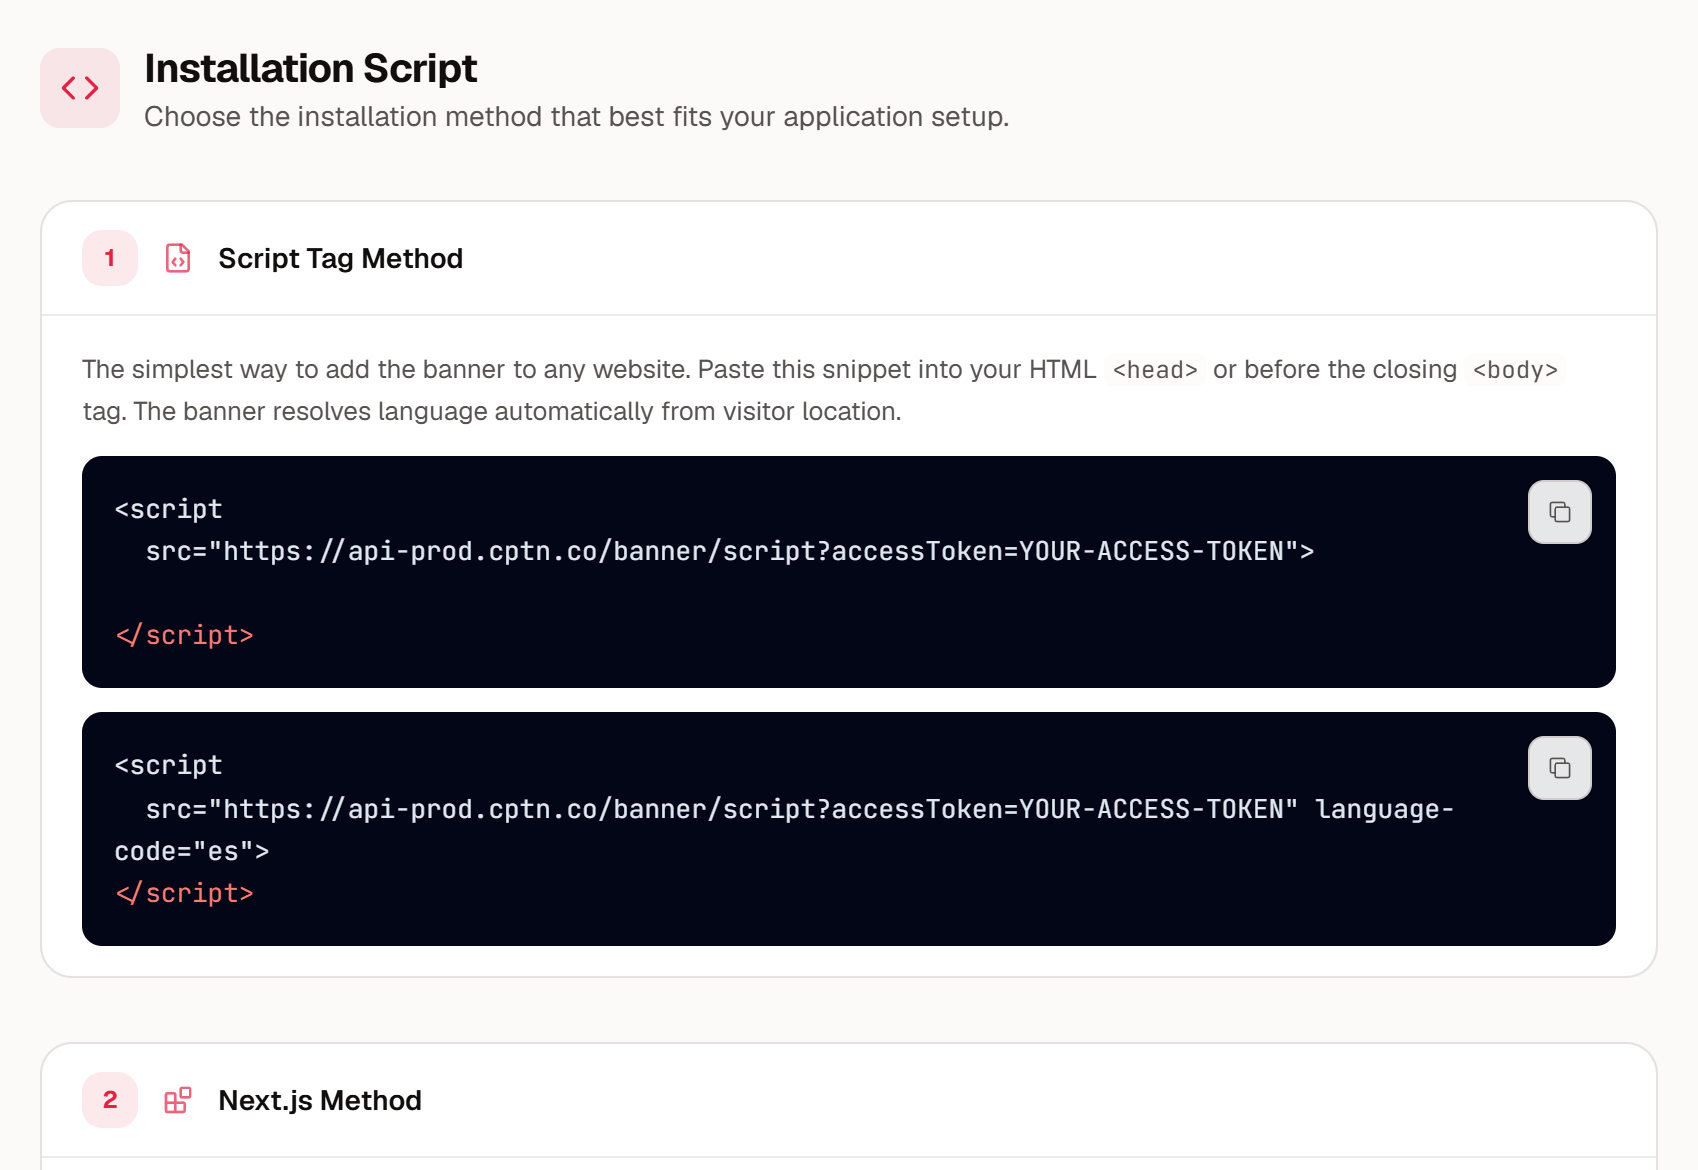
Copy the script for that domain. In the Captain Compliance app, select Consent banner in the sidebar, select the domain, and under Setup select Installation script. Copy the snippet under Script Tag Method.
Turn off Shopify’s own cookie banner. In the Shopify admin, go to Settings → Customer privacy. If both banners are on, visitors can see two banners, and the two can overwrite each other’s consent values. See How to Integrate Captain Compliance with Shopify.
Duplicate the theme before you edit it, so that you have a backup copy.
The script runs only on the domain it was issued for, with or without www. On a subdomain, the banner appears only if that subdomain has been added in Captain Compliance. On any other address, the banner does not appear. For example, a theme preview that opens on a different address does not show the banner. To add a domain or subdomain, see How to Scan Websites and Manage Domains.
The Installation script section in the Captain Compliance app:
Add the script to theme.liquid
In the Shopify admin, go to Online Store → Themes.
Next to the theme, select the … button, and then select Edit code.
In the Layout folder, open
theme.liquid.Paste the script on a new line directly after the opening
<head>tag, as shown below.Select Save.
<head>
  <script src="https://api-prod.cptn.co/banner/script?accessToken=YOUR-ACCESS-TOKEN"></script>
  ...
  {{ content_for_header }}
  ...
</head>
Leave the {{ content_for_header }} line in place. Shopify requires it, and it is where Shopify adds its own scripts and the scripts of your apps. Placing the Captain Compliance script above it lets the banner script load first.
Shopify notes
Checkout pages are not built from
theme.liquid, so the banner does not appear there. Shopify still holds the choice that the visitor made on the storefront, because Captain Compliance passes it to the Customer Privacy API. See How Captain Compliance Syncs Consent with the Shopify Customer Privacy API.A theme can have other layout files, such as
password.liquid. Add the script to each layout where the banner should appear.The script lives in the theme. If you publish a different theme, add the script to that theme too.
Shopify notes that editing a theme’s code can stop the theme from updating automatically.
Install through Google Tag Manager instead
You can load the banner from GTM only if the GTM container itself is loaded from the theme code. In that case, add the Captain Compliance CMP template to the container, enter the access token for the domain, and set the tag to fire on Consent Initialization - All Pages. See How to Install and Configure the Captain Compliance CMP Template in GTM.
A GTM container that runs inside a Shopify custom pixel, under Settings → Customer events, cannot show the banner. Shopify runs custom pixels in a sandboxed frame that is separate from the page. If that is how your store loads GTM, add the banner script to theme.liquid as described above.
Use one method only. If you install through GTM, do not also paste the script into the theme.
Confirm the banner is live
Open the storefront in a private or incognito browser window.
Confirm that the banner appears, and try Allow, Reject, and Cookie Settings.
View the page source and search for
api-prod.cptn.coto confirm that the script is in the head.Open the browser console and run the command below. Before you choose, the values show the default for your region. After you choose, they match your choice.
If the banner does not appear, see How to Troubleshoot a Consent Banner That Does Not Appear or Respond. For a full test plan, see How to Test Consent Banner Configuration & Behavior.
Shopify.customerPrivacy.currentVisitorConsent();For Shopify’s own instructions on editing theme code, see Edit theme code in the Shopify Help Center.